If your car didn’t come with Android Auto built-in, you might’ve thought you were stuck paying hundreds for a fancy aftermarket head unit. Here’s the good news: you probably already have what you need sitting in a drawer somewhere.
That old Android phone or tablet gathering dust? It can become your car’s command center. Headunit Revived is a free, open-source app that transforms any Android device into a fully functional Android Auto display—giving you navigation, music controls, messaging, and voice commands without breaking the bank.
What You Get With Headunit Revived
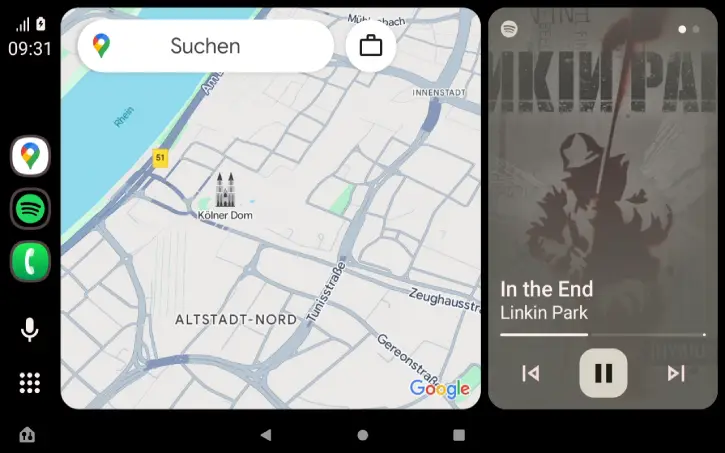
The app brings everything you love about Android Auto to your spare device. Navigation stays front and center with real-time traffic updates. Your music and podcast apps work seamlessly through a simplified interface. You can split the screen to watch directions while controlling your playlist. And thanks to built-in voice control integration, you can keep your hands on the wheel while issuing commands to Google Assistant.
The real magic is flexibility. You can connect via USB for a rock-solid connection, or go wireless for that completely hands-free feel. Whether you’re using an older phone or a larger tablet, the app adapts to whatever screen size you throw at it.
How to Set up Headunit Revived to Turn Old Android Phone/Tablet Into Android Auto Headunit
Step 1: Install the App
Download Headunit Revived APK from either GitHub (free) or the Google Play Store (small one-time fee).
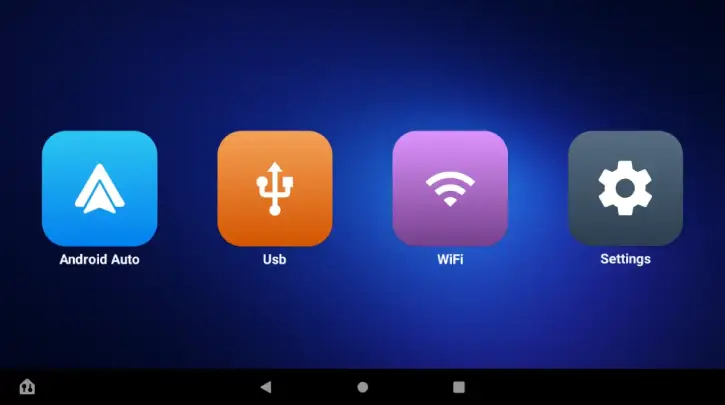
Step 2: Choose Your Connection Method
Decide if you want to use USB (more stable) or wireless (more convenient). Both work perfectly depending on your car setup and personal preference.
USB Method
- Connect your Android phone to the tablet running Headunit Revived via USB cable.
Make sure that Android Auto is installed on your phone.
Set your phone to Host-Mode if necessary and select Android Auto
Click the USB Button in Headunit Revived, find your phone and click the right button to allow connection
Click on your phone in the list and wait for Android Auto to start
Wireless Method
- Install the Wireless Helper from Google Play Store
In Headunit Revived Settings, set Wireless Mode to Helper Mode.
Ensure both devices are in the same network (Hotspot or WiFi).
Open the Wireless Helper app on your phone and start the service.
The helper will find your headunit and initiate the connection automatically.
Step 3: Mount Your Device
Position your phone or tablet where you can see it safely while driving. A dashboard mount works great for this.
Step 4: Connect and Go
Once you’re in the car, open the app and hit connect. That’s it. Your display is ready to use—navigation, music, messages, everything.
Step 5: Start Using It
Use voice commands, tap the screen for controls, or let it run passively while you focus on the road. The interface is designed to minimize distractions.
Why This Actually Works
Before setting this up, most people mount their main phone in the car and juggle everything on one device. It’s clunky. With a dedicated display running Headunit Revived, your daily phone stays in your pocket, and your old device becomes a purpose-built car computer. Even better, if you don’t have a spare device, you can run Android Auto directly from your main phone instead.
The biggest win? Navigation is always visible and optimized for driving. You’re not squinting at a tiny map or fumbling with your phone. Everything is larger, clearer, and designed specifically for in-car use.
The Bottom Line
Headunit Revived gives old Android devices a second life while saving you hundreds of dollars. Whether you want a dedicated display or a backup Android Auto option for your main phone, this app delivers genuine convenience without the premium price tag.


Comments (0)