DNS servers (Domain Name System), such as the OpenDNS, Google Public DNS, Cloudflare 1111 DNS, etc., can be used as an alternative to your ISP’s DNS server on your computer and smartphone for faster internet connection. In addition to being faster than your ISPs DNS server, they offer many security layers to protect your device from internet threats. They will also prevent browsing bottlenecks that affect web page loading.
Here’s how to quickly change your favourite DNS servers on your Windows 10 PC. Google Public DNS and Cloudflare 1111 DNS are the most popular free DNS servers available today. All these services support IPv4 and IPv6 protocols, but setting up the DNS server in Windows is not as easy as many think. And, frequently changing among them is a painstaking task.
There is a fastest way to change the DNS server (IPv4 and IPv6) in Windows 10 with the help of QuickSetDNS app. It helps you change DNS servers on your computer quickly without going to your network device property.
The QuickSetDNS app supports all Windows versions, including Windows 10. It provides a quick way to set the desired DNS servers from the user interface of the app. You need to choose from a list of DNS servers that you defined.
Steps to Change DNS Servers on Windows Quickly with QuickSetDNS App
The latest version of QuickSetDNS provides Google public DNS, Cloudflare Public DNS, and Quad9 Public DNS servers only. And, there is an Automatic DNS option that sets the DNS server received from your router automatically, using DHCP. You can also add any DNS server to the list by using the New DNS Server option.
- Download QuickSetDNS zip file (link) and unzip it on your Windows PC.
- Double click on quicksetdns.exe file to open it.
- Select your desired DNS sever from the list and press F2 for IPv4, and press F7 for IPv6 protocol.
- You’re ready to browse fastly and safely.
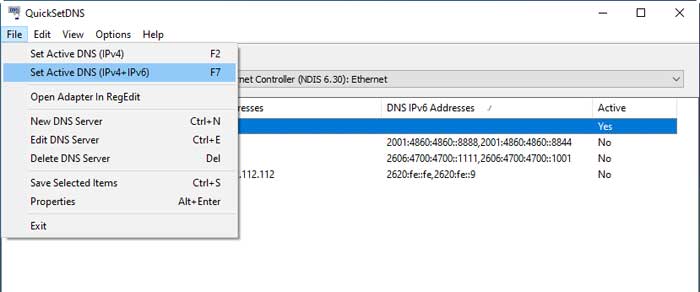
To add a new DNS server to the list, open QuickSetDNS, click Ctrl+N shortcut key, enter DNS name, add IPv4 address and IPv6 address provided by the service in the respective filed.
How to know if have IPv4 or IPv6 network connection?
Open a command window on your Windows PC, type ipconfig and press Enter. Look for the IPv6 address and default gateway. It will written as 2001:db8:85a3::8a2e:370:7334.
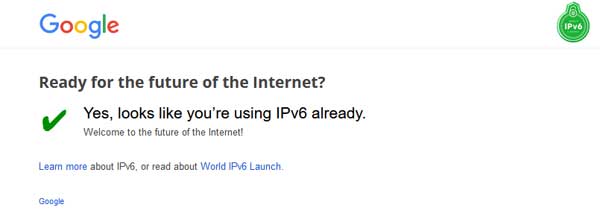
Alternatively, use the Google service to test IPv6. Enter this web page and to know whether you’re on IPv4 or IPv6.
More Resources: