Less speed and higher latency in Wi-Fi are common issues. Even if you have a 60MB or above Wi-Fi plan, sometimes you will get far below that speed. There are a couple of reasons for lower Wi-Fi speed. However, if you do not have a 5GHz band router or your device is not configured to receive a 5GHz band, you will only get less speed in Wi-Fi. If you own a dual-band router, you can fix less speed issue by switching to 5GHz Wi-Fi mode in Windows 11.
The advantages of 5GHz Wi-Fi are it is faster, has lower latency, and less congested. So you will always get full Wi-Fi speed. Here is how to enable 5GHz Wi-Fi-only mode in Windows 11. It will ensure full Wi-Fi speed, especially when connecting to 60MB or above plans.
Most Windows 11 devices support a 5GHz Wi-Fi band, but it is configured in auto-mode to receive both 2.4GHz and 5GHz bands. Since 2.4GHz has a stronger signal, most often, your computer will connect to the 2.4GHz band. 2.4GHz band can only deliver up to 50MB speed in Wi-Fi. So even if you have a 100MB plan, you only get 50MB or less speed.
ALSO READ: Three Methods to View Saved Wi-Fi Passwords in Windows 11
By configuring your Windows 11 PC to receive 5GHz Wi-Fi only, you can fix the less speed in Wi-Fi. However, before switching to 5GHz mode, ensure you have a dual-band router configured to receive 2.4GHz and 5GHz Wi-Fi bands. And, your Windows 11 PC should be near to the router to get good signal strength, otherwise you will not get benefits of 5GHz.
How to Configure Windows 11 to Receive 5GHz Wi-Fi Only?
1. First, in your Windows 11 PC, right-click the Start button and select Device Manager.
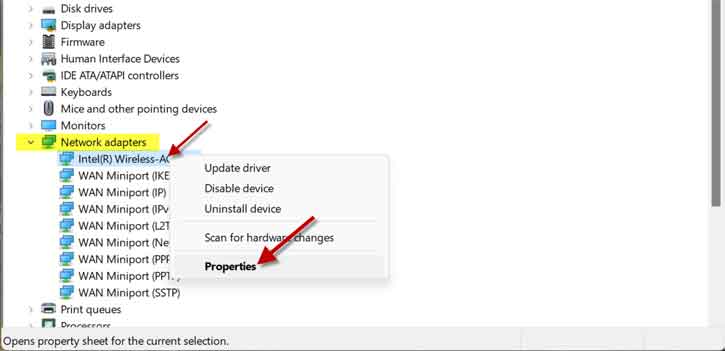
2. In Device Manager, expand the Network adapters menu.
3. Right-click the Wi-Fi device and choose Properties.
4. Next, select the Advanced tab and click the Preferred Band option.
5. Click the Value drop-down menu and select the Prefer 5GHz band option.
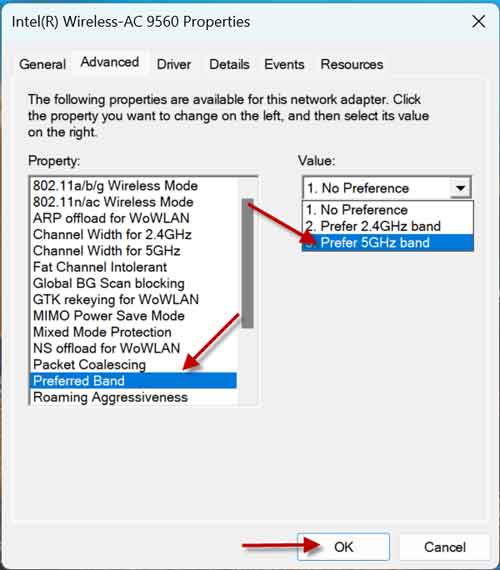
6. Click OK to save the changes and close Device Manager.
Note that on some PCs, you may need to choose the 5GHz compatible standard, such as 802.11ax (preferred), 802.11ac, or 802.11n in the Wireless mode option.
You have now enabled 5GHz band mode on your Windows 11 PC. Your PC should automatically connect to the 5GHz band for any network that operates in 5GHz and 2.4GHz modes.
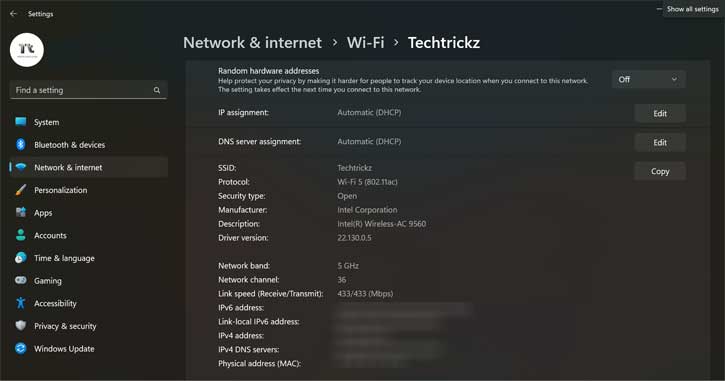
To check if your PC is connected to the 5GHz band, open the Network & Internet menu. Click on the Wi-Fi properties and look for the network band. It should be 5GHz.
More Resources: