Problem with connecting to Wi-Fi networks is a usual thing on Windows PCs. No internet even if connected to a Wi-Fi network, cannot detect a Wi-Fi network, unable to connect to a network, Wi-Fi has no valid IP configuration, etc., are common problems of Windows 11/10 PCs. Here are a few workarounds to fix the Wi-Fi connecting issues on Windows 10/11 PCs.
Like on smartphones, there are a few reasons for the Wi-Fi connection not working on computers. But they are easy to fix. If the network adapter is not physically damaged, the below-given methods should resolve most of the problems related to the Wi-Fi connection on a Windows 11/10 PC.
1. Wi-Fi is Connected, but no Internet
It is one of the most common network connection problems in Windows 10/11 PCs. You can try to fix the issue using the Troubleshoot problems option of Windows. If this does not help, then follow the below steps to reset the network adapter.
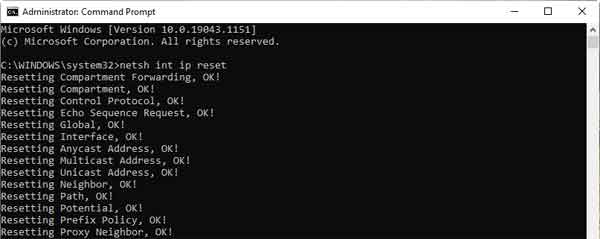
To reset network adapter, open command prompt as administrator and run the below commands one by one:
netsh int ip reset
ipconfig /renew
ipconfig /flushdns
netsh winsock reset
2. Cannot Connect to Wi-Fi Network
Sometimes Windows 10/11 PC will not connect to any Wi-Fi network. Usually, this issue is related to the network adapter and its driver software. Most probably, it might be due to corrupt driver software. To fix this issue, follow the below steps.
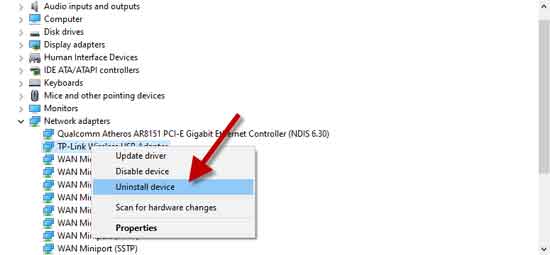
- Press Windows + X keys on the keyboard, and choose Device Manager from the list of menus.
- In Device Manager, right-click on Network adapters and choose Uninstall option.
- Next, click on Delete the driver software for this device.
- Reboot the PC, and Windows will reinstall the drivers automatically.
3. Unable to Detect Wi-Fi Networks
If Windows 10 PC does not detect a network, then it might be due to the Router issue. First, turn off your Router and power on it again after a few minutes. Now, try to connect to your computer. If that does not help, try the below methods.
4. Restart Wireless Adapter (NIC)
- Press Windows + R to open the Run command box.
- Type ncpa.cpl in the box and press Enter.
- Next, right-click on the wireless adapter and then click on the Disable option.
- Now, right-click on the wireless adapter and then click on Enable.
- Reboot your PC and try to connect to the Wi-Fi network.
5. Update Wireless adapter (NIC) driver
- Press Windows + R and type devmgmt.msc in the Run command box and press Enter key.
- Expand the Network adapter menu, right-click on the Wi-Fi adapter and choose the update drivers option.
- Now, select the ‘Search automatically for updated driver software option.

If you cannot find a new driver, click on the ‘Search for updated drivers on Windows update’ option.
After installing the driver file, reboot the system.
6. Update Router Firmware
The latest firmware update may fix most of the Wi-Fi-related issues on Windows 10 PC. Updating the Router firmware is slightly a complicated process.
- Download the latest firmware file for the Router from the support page.
- Login to Router’s interface with provided IP address, username, and password.
- From Router’s Firmware update section, choose the downloaded file to update.
These are some of the most common reasons and their solution for Wi-Fi not working issue on Windows 10 and Windows 11 PC.
More Resources: