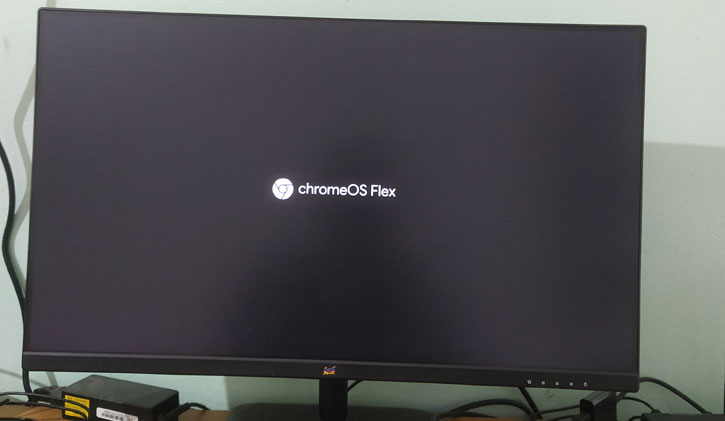
ChromeOS Flex is a lightweight operating system from Google, and it is developed to run on nearly any computer. Based on the CloudReady OS, a modified version of ChromeOS that runs on most PCs and Macs, ChromeOS Flex is now available for download. Here is how to create a bootable ChromeOS Flex drive and install or run it on your existing PC.
The main aim of this lightweight ChromeOS Flex is to replace Windows and macOS on older computers. And this version of ChromeOS is suitable for business and education and can manage remotely, just like Chromebooks. ChromeOS Flex also includes Google Assistant, support for Family Link accounts, Smart Lock, Instant Tethering, and Nearby Sharing.
Now Google has released ChromeOS Flex for general use. You can use it to rejuvenate a PC or laptop that’s too old to run Windows 10 or 11 operating system. Once installed, ChomeOS Flex provides easy access to Google’s online tools, including Chrome, Docs, Gmail and YouTube. Here is how to create a bootable ChromeOS Flex USB drive and install it on any computer. You can also run the OS directly from the USB drive without installing it on your PC.
ALSO READ: How to Format ChromeOS Flex USB Stick and Restore Lost Space
How to Install ChromeOS Flex on Any Windows or Mac Computer
Important: Not every old computer can use ChromeOS Flex. This is because ChromeOS Flex needs an internet connection to work, but the OS does not support many old Wi-Fi dongles or adapters. See Google certifies models list.
Below are the minimum requirements to run ChromeOS Flex:
- 64-bit Intel or AMD CPU (It does not support ARM-based systems) with supported Wi-Fi adapter or dongle.
- 4GB RAM and 16GB USB drive.
- A PC with support for USB booting, BIOS/UEFI/Secure Boot settings.
- Internet connection.
How to Create a ChromeOS Flex Bootable USB Disk?
1. Connect 8GB/16GB USB drive to your computer.
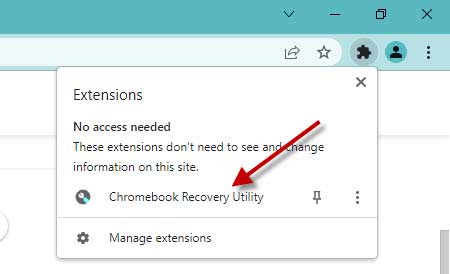
2. On your computer, open the Google Chrome browser and install the Chromebook Recovery Utility extension (link).
3. Next, click on the extension icon shown at the top right corner of the Chrome browser and click on the Chromebook Recovery Utility option.
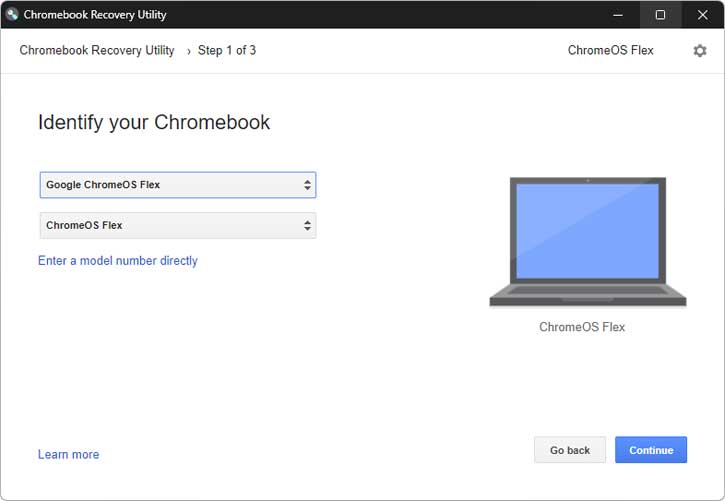
4. Next, in the new window, click on Get Started button, and in the next screen, click on the Select model from a list option.
5. Click on the first dropdown menu and select Google ChromeOS Flex.
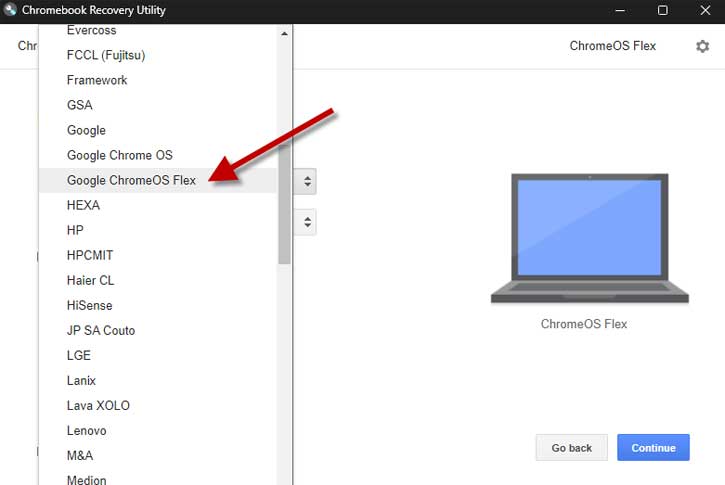
6. Next, click on the Select Product dropdown menu, choose the ChromeOS Flex and click the Continue button.
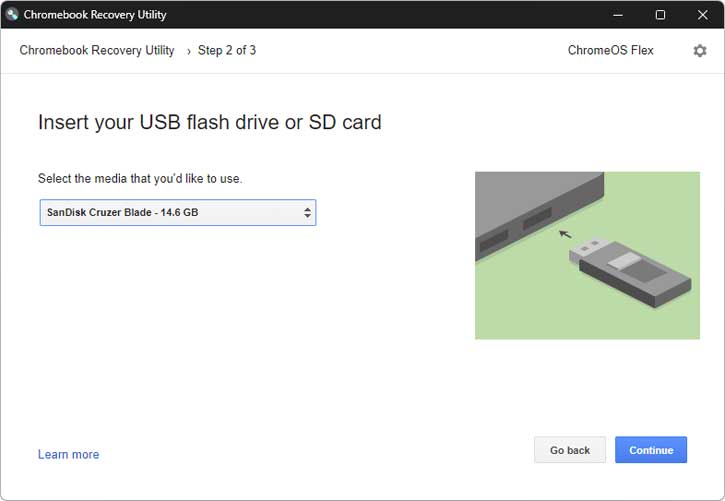
7. On the next page, select the USB drive and click Continue.
8. In the next window, click on Create Now button. It will format the USB drive and create the bootable USB. Once done, click on the Done button.
How to Run ChromeOS Flex on your PC (No Installation Required)?

1. Turn off the PC and plug the Chrome OS Flex bootable disk into your PC.
2. Next, turn on the PC and boot from the USB. Press the boot key (F2, F12, Del, F9, etc. Boot keys might be different on different PCs) and select Chrome OS Flex drive.
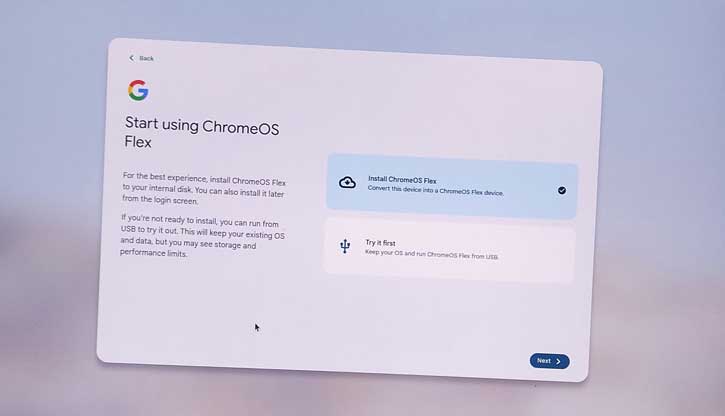
3. After booting it, select the Try It First option o the Welcome screen.
4. Follow the on-screen instruction and then sign in to your Google account. You can also log in as a guest.
How to Install ChromeOS Flex on your Computer?
1. To install Chrome OS Flex on your computer, select the Install ChromeOS Flex option and click Next button.
2. Follow the onscreen instruction to install ChromeOS Flex.
3. Once the installer has finished its task, it will shut down your computer. Unplug the USB stick and reboot.
4. Accept the terms and conditions and enter your Google Account login details.
5. When you’ve finished working through the instructions, ChromeOS Flex will be up and running.
The look and feel of ChromeOS Flex are similar to ChromeOS on a Chromebook but have a few differences. ChromeOS Flex does not support Android Apps or the Google Play Store and Parallels Desktop. Also, secure boot isn’t as robust as on real Chromebooks, as the ChromeOS Flex hardware doesn’t have a Google security chip for verified boot or a Trusted Platform Module (TPM).
Note: The post was first published in February 2022 and updated in November 2024 with additional information.
More Resources: