Have you updated your Windows 8.1 system to the new version? The KB2919355 update usually will install automatically via the Windows Updates feature or you can download and install it manually. However, after updating your system, Windows will leave gigabytes of files related to the update. As these files are not needed, you can remove them from the hard disk to save the space, unless you want to remove the update.
If you don’t know how to delete Windows 8.1 update files after you have installed the latest Windows 8.1 update to your system, follow simple steps given below. Keep in mind that, if you want to remove the update (which is unlikely) DO NOT deletes the update file.
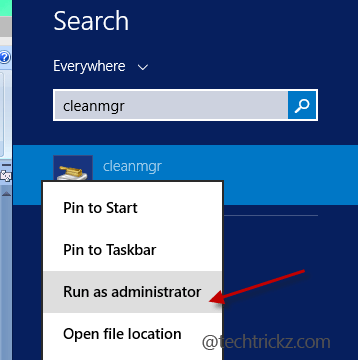
1. Click Win + Q key to get search option (For touch screen device, swipe screen from right edge to the left to open the charms bar and then tap on Search).
2. In the search box, type cleanmgr.exe. When you see the program (Disk Clean up utility), right click (or long press) on it to see more options and select “Run as administrator”.
3. Now, select the partition on which Windows is installed (usually it would be C: partition). The Disk Cleanup utility will scan your system for unnecessary files. It’ll take few seconds before it shows the list.
4. Select the option “Windows Update Clean-up” from the list and click OK to remove the file.
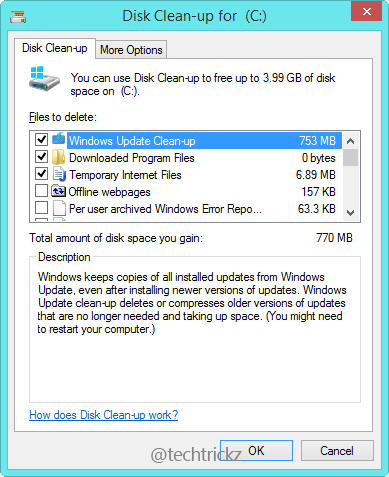
Note: You can also select other options from the list to clean other types of junk files such as temporary internet files, temporary system files, and so on, then click on the OK button and it will clean all the selected junk files.


