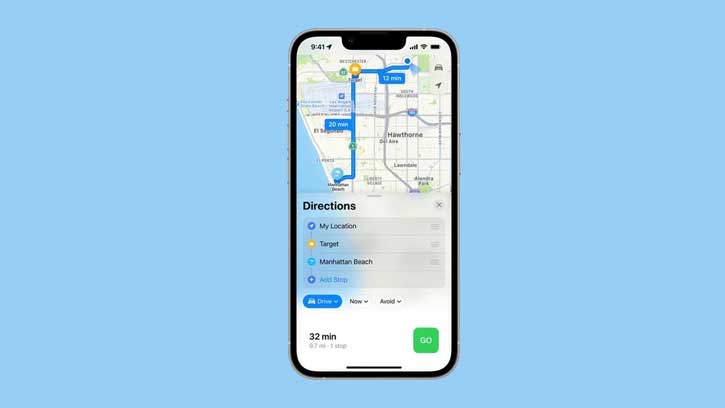
Multi-stop routing is a familiar feature for Google Maps users on Android and iPhone. This feature helps users plan their routes and add directions to multiple destinations on Google Maps. But multi-stop routing is a new feature for Apple Maps users, and it is now available with the latest iOS 16 update. Here is how to use multi-stop routes in Apple Maps on iOS 16.
The multi-stop routing feature is available on iPhones running on iOS 16. Apple Maps supports up to fifteen stops in advance (Google Maps allows you to add up to nine stop points), and you can add more later. If you are planning a long-distance route, you can use this feature.
The multi-stop feature is available with iOS 16 and iPad OS 16 update (currently in beta), and it is available on all iPhones and iPads that support the update.
ALSO READ: How to Enable Haptic Feedback on iOS16 Keyboard
How to Add Multiple Stops to Your Route on Apple Maps?
1. Open Apple Maps on your iPhone/iPad running iOS 16/iPad OS 16.
2. Now, add your start point and destination on maps. In the search field, enter your destination, assuming your start point is your current location.
3. Next, under the Directions tab, tap on the Add Stop option.
4. Select the place you want to add as a stop in the route.
5. Your stop will add to the bottom of your list.
You have now added a stop in your route map on Apple Apps. As said above, you can add up to 15 stops on your route. And, after starting your journey, you can add more stops using Siri. Just say, “Hey Siri, add “location name” as a stop.
The good thing with this feature in the Apple Maps app is that you can easily rearrange your route. Just move your stops by holding the three-line icon and dragging it into the required position. If you decide to delete any stop you created from your route plan, swipe it to the left.
More Resources:
- How to Reset Your iPhone/iPad Without a Computer and iTunes or Finder App
- Enable the Use Face ID with a Mask Option to Unlock iPhone
- How to Check Air Quality of Your Region in Google Maps
- Enable 3D View in Google Maps on Computer and Smartphone


