The search feature provided with Windows 7 is quite powerful since this feature is completely integrated with the operating system itself. All a user would have to do is, click ‘Start’ and type the first few letters of a file name. A list of files would then be displayed on the menu.
Some times you may notice that not all file types appear on the search list. This is because Windows 7 has only few file types specified to its search index. This guide let you know how to add new file type to the index in Windows Vista and Windows 7To add a new file type in Windows 7 follows the steps below. This how to tip is also applicable to Vista and very simple to follow. All you need a few clicks to get things done.

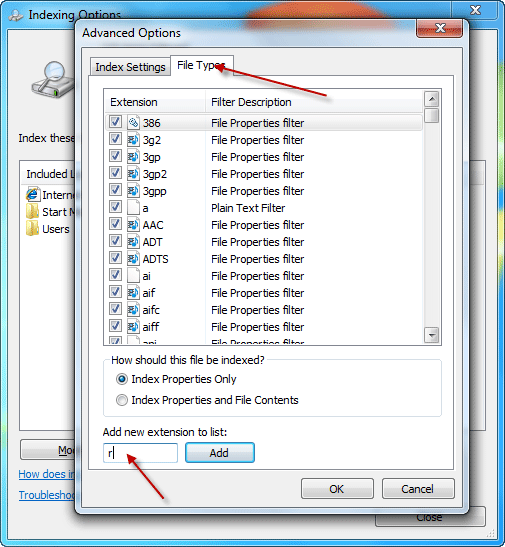
- Click ‘Start’ type the word index in the search box and press enter button.
- On the resulting window click the ‘Advanced’ button
- Click the file type tab
- On the next window, at the bottom type a three letter extension
- Click the Add button to enlist files of the extension to be include in the search indexing.
Hope this tutorial helped you to get things done quickly on your computer.


