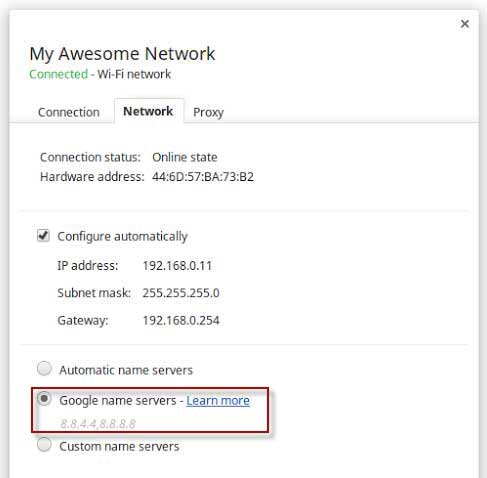
As you may know, changing your computers or mobile device’s DNS server to Google Public DNS or OpenDNS can render webpages more fastly and prevent browsing bottlenecks. I had written many articles on this subject in previous articles, here is how to change your Chromebook’s DNS sever to Google Public DNS.
[Google Public DNS is a free, global Domain Name System (DNS) resolution service that you can use as an alternative to your current DNS provider. To try it out, configure your network settings to use the IP addresses 8.8.8.8 and 8.8.4.4 as your DNS server]
How to Change Chromebook’s DNS sever to Google Public DNS?
Currently it is an experimental feature and available on the development channel of Chrome OS. However, it’ll be available publically soon.
– Open chrome://flags on your Chromebook. Look for “Experimental static ip configuration” and enable it
– Restart your Chromebook

– After restarting, navigate to chrome://settings, click on your network name and go to the overlay tab “Network” and enable the option “Google name servers“. [Via]


![[Update] How to Fix ‘Can’t Connect to Messages for Web’ Issue Google-Messages logo](https://techtrickz.com/wp-content/uploads/2022/10/Google-Messages-218x150.jpg)
