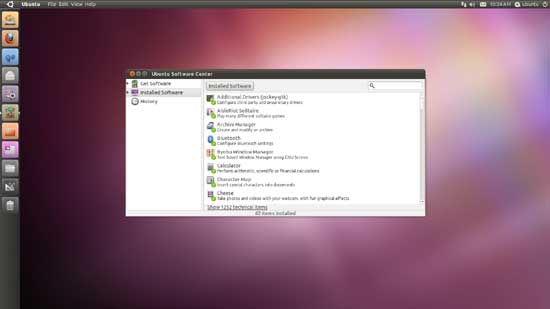
Many Linux enthusiasts want to try Ubuntu to learn about it, but don’t know how to install it safely on their Windows machine. Wait! Before installing Ubuntu on your machine you can taste its flavor by installing on a USB Pendrive. But main problems that many users facing are boot error and their motherboard doesn’t have USB boot support. But, don’t worry! Here is how to overcome these two situations.
To make a bootable live Ubuntu USB drive following things is required
- ISO image of Ubuntu operating system (Download it. Tested with Ubuntu 10.10 Netbook edition)
- Unetbootin (download it from here)
- USB flash drive (tested with Sandisk 4Gb pendrive )
Now How to create bootable Ubuntu Live USB drive
- Insert USB drive into your PC and format it in FAT 32.
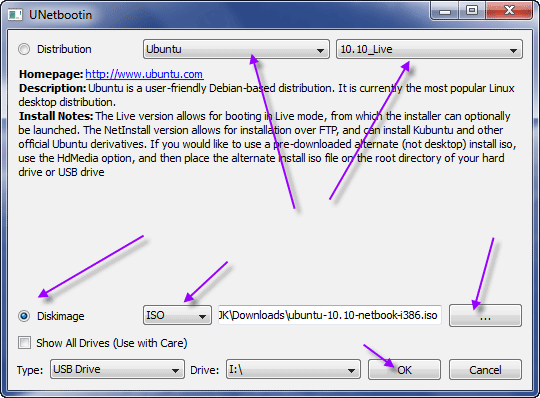
- Run UneBootin (no installation required). Select distribution (here is Ubuntu) and select version (10.10_live). These two things should be exact; otherwise you’ll get boot error.
- Now select ISO and browse for the Ubuntu iso image you downloaded previously. Your USB drive will be selected automatically. Then click Ok. After completing the process, you’ll be asked to reboot your PC.

Next you need to make changes in the BIOS to boot your Ubuntu USB.
For that, while your system is rebooting press F2 or Delete button in the keyboard (depending on your motherboard it should be F1, F2, F12, ESC, Backspace, or Escape) to enter into Bios setup. Now change the startup order to boot USB by default. Save the changes and restart the system. Now you will have Ubuntu running from USB drive.
Now how to boot from a PC that has no USB boot support
Some old motherboard doesn’t support USB booting. But you can add USB boot support for such PCs with the help of a small program called Plop Boot Manager. Read here for how to do that.


![FlashBoot: Make Installable/Bootable Clone of Windows 11/10/7 [Giveaway] FlashBoot - Installable clones of Windows](https://techtrickz.com/wp-content/uploads/2025/05/FlashBoot-Installable-clones-of-Windows-218x150.webp)
Thanks for sharing this excellent tool and tutorial. It is very helpful to me. I have bookmarked it too.