If you want to run more powerful applications, install custom ROMs or give your HTC One Android smartphone a new look (replacing Sense-style menus, status bar, etc.) you should have root access to it. Rooting an HTC One is a pretty straightforward and simple process with HTC One All-In-One toolkit.
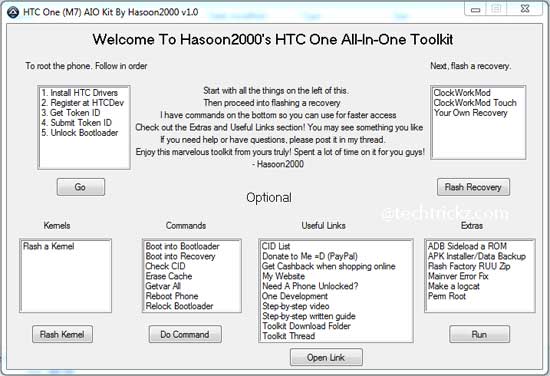
Thanks to the simple and accessible toolkit by Hasoon2000, it gives you the entire process from unlocking the bootloader, rooting and to installing a custom recovery in an easy-to-use package.
Important Note: As known by all, rooting will void your device’s warranty. Do below guide at your own risk. We will not take any responsibility for any damage to your device caused by it. Also, do not forget to backup your device before rooting.
Now, head to the HTC One forums at xda-developers.com and download the latest HTC One All-In-One toolkit (39MB). Note that, it is intended for Windows only.
– Install driver for your HTC One to connect the phone to your PC (You can find download in the thread). If you have previously connected and synced your device to the PC, they should already be installed.
– Unzip the downloaded toolkit using any zip archiver such as 7Zip, connect your phone to your PC and run the program.
– Follow the instructions one by one. Finally, flash a recovery of your choice from the box in the top-right corner. You can choose ClockWorkMod, ClockWorkMod Touch or Your own recovery. Choose ClockWorkMod Touch, for instance.
Troubleshooting: While doing above steps if your HTC One refuses to boot or turn on, long press on the Power button and then repeat the above rooting process again. It’ll solve the issue.


