Redmi 3S, Prime and Redmi 3X are the newest affordable devices from Xiaomi. If you want development on these devices, like installing CyanogenMod custom ROM, flash zip files, etc. needs unlocked bootloader, TWRP custom recovery and root access. Though you can do all these via command prompt, the Redmi 3S Flasher Toolkit helps you do with a few clicks.
In this tutorial, we show you how to install TWRP recovery and root Redmi 3S, Prime, Redmi 3X with Redmi 3S Flasher Toolkit. Using Redmi 3S Flasher Toolkit is simple. All you need a computer and a USB cable to establish connection between your Redmi 3S, Prime and Redmi 3X and computer.

Before start, note that ADB and fastboot drivers must be installed on your computer to use the Redmi 3S Flasher Toolkit. If not, your computer will not recognize your handset.
Read on to know how to use Redmi 3S Flasher Toolkit to install TWRP recovery and root your Redmi 3S, Prime or Redmi 3X. Before proceeding, note that your device’s Bootloader must be unlocked
Requirements:
1. Unlocked Bootloader (If not, go here)
2. ADB and Fastboot drivers installed on the PC (Details here)
3. UPDATE-SuperSU-v2.76 zip file (Download here)
4. Flasher Toolkit Redmi 3S/Prime/3X (Download here, source)
5. Battery charge above 70%
How to Install TWRP Recovery and Root Redmi 3S
Warning: The below procedure will void warranty, so do it at your own risk. Also, the procedure is risky and will wipe your device completely. Backup any data before proceeding with the below steps.
Disclaimer: Follow the instruction at your own risk. We will not be liable if any damage occurs to your device and/or its components.
1. Turn on USB Debugging on your phone. To do so, go to Setting ->Developer options and enable USB Debugging. (If you have not enabled the Developer options, then go to About phone under Settings and tap build number 7 times).
2. Connect your Redmi 3S, Prime or Redmi 3X to your PC via a USB cable and move the downloaded ‘UPDATE-SuperSU-v2.76.zip’ file to the ‘Download’ folder of your phone.
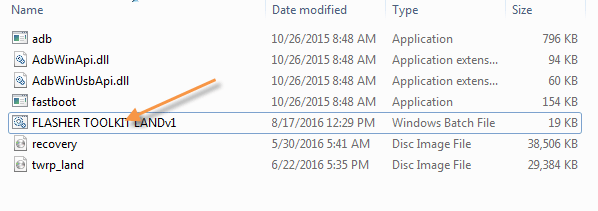
3. Unzip the Flasher Toolkit zip file, copy all the contents and save it inside the ADB installation directory.
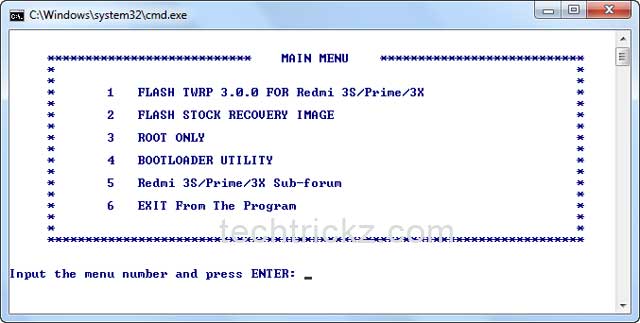
4. Double click the ‘FLASHER TOOLKIT LANDv1.bat’ file and you will get a window with several options.

5. To flash TWRP 3.0.0, click number key 1on the keyboard and follow the on-screen instructions

6. Once the flashing is done successfully, you will be asked to install UPDATE-SuperSU-v2.76.zip file.
7. In TWRP recovery, tap ‘Install’, select the UPDATE-SuperSU-v2.76.zip file and swipe to confirm the flashing.
Finally reboot your phone and check root access by using any root checker app. If you have any question, let me now it in the comment section below (Source – MIUI).


