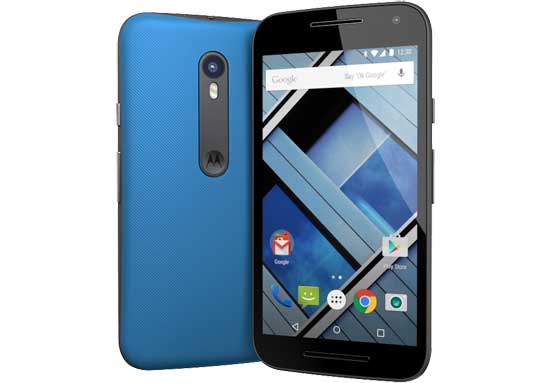
Flashing custom recovery, rooting, installing custom ROMs and custom kernels are the most common causes for bricking an Android phone like the Moto G 3rd Gen. Performing any of the above said things carelessly can end up with a non-booting system. This situation is called soft bricked, which is hard to recover in most cases, because it damages the bootloader.
In this tutorial, we let you know how to unbrick a bricked Moto G 3rd Gen (all variant) including Moto G Turbo edition. If you have bricked your 3rd Gen Moto G 2015, you can unbrick it by restoring bootloader and installing stock firmware on it. However, you should have knowledge on ADB and fastboot commands.

Below guide supports all variant of Moto G (3rd Gen) including Moto G Turbo edition, 1GB and 2G RAM versions, such as XT1550, XT1556, XT1557, XT1540, XT1541, etc. However, depending on the model, you may need to make small alteration in the commands, which is also detailed in the guide.
Warning: The below mentioned file is taken from XDA. We are not responsible for anything that goes wrong. Follow the guide at your own risk. Also, playing with Fastboot commands can seriously damage your phone, so take extreme care while issuing commands.
Unbrick a Bricked Moto G 3rd Gen
Disclaimer: Follow the instruction at your own risk. We will not be liable if any damage occurs to your device and/or its components. Backup all data you have on the phone before proceeding.
1. Download [HERE] and install Motorola drivers on your computer
2. Setup ADB and Fastboot drivers on your computer
3. Download [HERE] latest Fastboot zip file (for Windows and Linux)
4. Download stock firmware for your Moto G3 [HERE]. Download correct firmware for your model number.
5. Unzip both the Fastboot zip file and firmware zip file and save the entire file inside the ADB installation folder (C:\adb)
6. Switch off your phone and boot into fastboot mode by pressing ‘Volume down’ then ‘Power’ button.
[Alternatively, connect your phone to your PC and issue the command adb reboot-bootloader from ADB installation folder]
7. Now, go to the folder where you have saved the extracted firmware file, open a command window there and issue the below commands one-by-one.
[The command ‘system.img_sparsechunks’ may differ in number and name. Always check contents of folder you are working with. You must flash all of the sparsechunk files you have]
fastboot oem fb_mode_set

fastboot flash partition gpt.bin

fastboot flash bootloader bootloader.img

fastboot flash logo logo.bin

fastboot flash boot boot.img

fastboot flash recovery recovery.img

fastboot flash system system.img_sparsechunk.0

fastboot flash system system.img_sparsechunk.1

fastboot flash system system.img_sparsechunk.2

fastboot flash system system.img_sparsechunk.3

fastboot flash system system.img_sparsechunk.4

fastboot flash system system.img_sparsechunk.5

fastboot flash system system.img_sparsechunk.6

fastboot flash system system.img_sparsechunk.7

fastboot flash system system.img_sparsechunk.8

fastboot flash modem NON-HLOS.bin

fastboot erase modemst1

fastboot erase modemst2

fastboot flash fsg fsg.mbn

fastboot erase cache

fastboot erase userdata

fastboot erase customize

fastboot erase clogo

fastboot oem fb_mode_clear

fastboot reboot
After rebooting your Moto G 3, set up your phone and enjoy. Any question? Leave it in the comment section below. (Source – XDA)


![[Update] Download Samsung Stock Firmware Directly From Samsung Servers & Install via Odin Samsung-Galaxy-S10](https://techtrickz.com/wp-content/uploads/2019/03/Samsung-Galaxy-S10-218x150.jpg)

i need blankflash for xt1557
THANK YOU!!! Thats just came back to life my phone. I though I had to take it to some place and wait for it to be fixed and to pay for that. Well, you are my hero. This is a simple tutorial that saved my phone.
It is prompting failed (remote failed) from fastboot flash boot boot.img.. what should I do? Please help
To flash custom ROM requires latest version of custom recovery (preferably TWRP)
so how to flash rom? i have custom rom of 7.1 android version and i want to flash my custom rom back. How can i do this?
My Moto g turbo (XT1557) is not booting up ..im unable to go in fastboot mode…repair center says ur motherboard has to be changed ..i need blank-flash for moto g3 turbo Edition/moto g3 ..to send mobile in fastboot mode…
moto g 2013(gen1),2014(gen2),2016(gen4) have these files ..
It means you are attempting to install a firmware image that is older than what you have installed currently.
I got a error preflash Validation Failed after this command fastboot flash partition gpt.bin
I was using lineage rom version 15.0 Oreo
My Moto g3 is XT 1550 2015 Model
I want to unroot it and also Wants install stock rom 5.1
Thanks, it was so simple, unbricked my moto g3
thanks a lot…unbricked my moto g te
u r a saver
Let us know the software version your device runs on and also let us know the downloaded software version.
My problem is when I flash this it will show
Preflash verification required
Why?
It means you have not proper fastboot driver for your device on your PC. In device manager, enable show hidden devices, look for yellow exclamation mark under other devices and update the driver
At step 6 using [Alternatively, connect your phone to your PC and issue the command adb reboot-bootloader from ADB installation folder] i get ” error: device ” not found.
At device manager under ports i get Qualcomm HS-USB QDLoader 9008 (COM10)
How can i fix this error?
No, the procedure will wipe your data.
After unbricking are there any chances of getting llost data & memory back again.?
Motorola drivers is not fastboot driver. Follow one of my guide to install fastboot drivers
in the first step about motorolla drivers installation, i get current version: N/A
thanks for the answer. i install the fastboot and i get the same error: device ‘null’ not found
It means you have not installed fastboot driver on your computer
Hi man!! At step 6, i used the alternative option [Alternatively, connect your phone to your PC and issue the command adb reboot-bootloader from ADB installation folder] but i get:
* daemon not running.starting it now on port 5037*
* daemon started successfully*
error: device ”not found.
Is there anything i can do?
There might have changes. Change the code accordingly, if so
we have normally 7 sparsechunk files