To see better photos and images on your computer, you should calibrate the monitor correctly. If your monitor is too bright or has more saturated colors, your photos will not be life-like. Moreover, a well-calibrated monitor is essential in certain situations, for example, making a print that looks similar to your monitor image, etc. Here is how to calibrate your monitor accurately.
Windows has a built-in tool to calibrate your monitor. You can use this tool to fix the brightness and color-related issue of your monitor. For example, if the display color is more red, blue, or green, Windows will help you fix it. Here is how to use the calibration tool in Windows 10.
Before starting, note that the color calibration tool in Windows cannot fix issues related to a damaged monitor. So, if the color or brightness issue is due to the monitor, you need to replace it to get a better color experience.
How to Calibrate Your Monitor Color in Windows 10
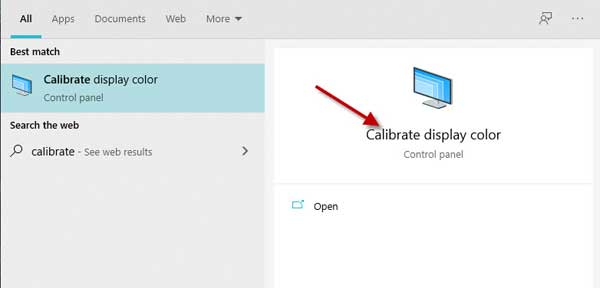
1. In Windows 10 search box, type calibrates display color and open the tool.
2. In the Display Color Calibration tool, click on the Next, Next, and Next buttons to continue.
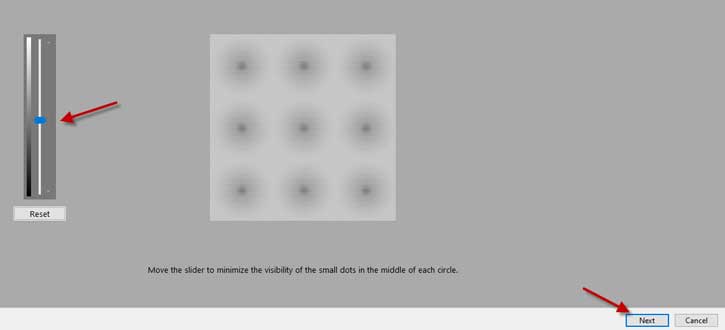
3. Now, you will enter into the Gamma adjustment screen. Adjust the slider to minimize the visibility of dots in the middle of each circle. Once done, click Next.
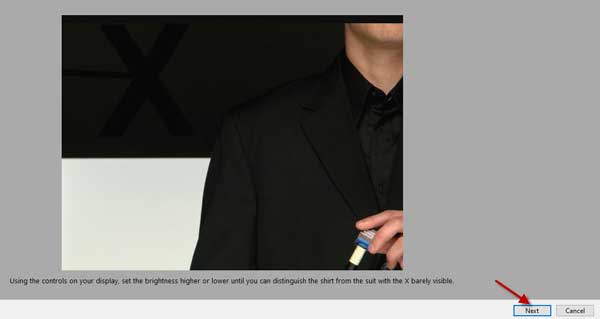
4. On the next screen, you will ask to adjust the brightness and contrast of the display. Use controls on your monitor to make changes. If no buttons on the monitor to adjust brightness and contrast, skip this step.
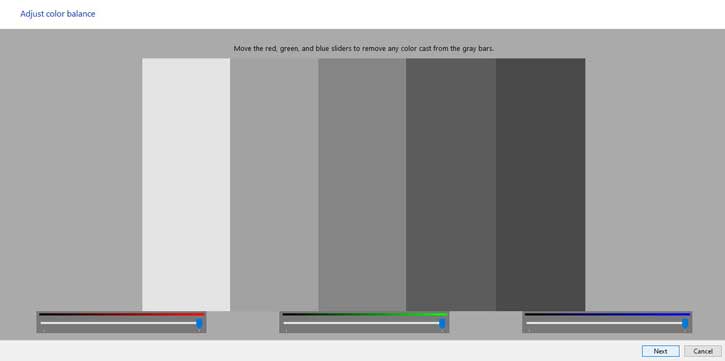
5. On the next screen, you can adjust the color balance. Adjust the RGB (Red, Green, Blue) as per your need.
6. Next, click on the Finish button to apply the changes.
That is all about how to calibrate your monitor for batter color balance in Windows 10. It will apply to Windows 11 also.
More Resources: