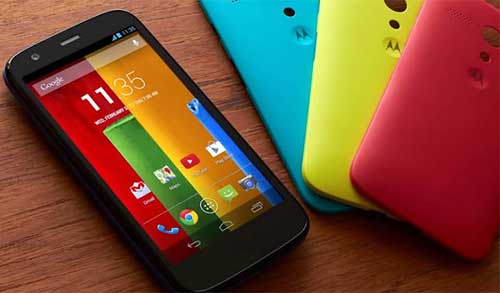
Recently we published a guide on how to root your Motorola Moto G on any firmware. Root access on Moto G gives immense opportunities for tech-savvy users. They can add missing features, apply various tweaks and changes that the manufacturer sees to make, flash custom ROMs and more, however, if you run into problems with the rooted Moto G and want to unroot and return back to the stock firmware, here is how it is.
Unrooting Moto G and installing stock firmware will remove all tweaks and changes you have made on it and return it to box fresh state. Also, keep in mind that, the process will erase all data from your device, so be sure to back up your data (contacts, sms, apps, etc.) using apps like Titanium backup before proceeding.

Disclaimer: Please follow this guide at your own risk. We can’t take responsibility for anything that goes wrong. This guide is intended for technically talented users only
Pre-requisites:
1. Motorola drivers installed on your PC (download Motorola Device Manager for driver from here)
2. Moto G stock firmware (download from here)
3. Fastboot file for Moto G (download from this link)
4. Minimal ADB and fastboot driver (download from this link)
Unrooting and Installing Stock firmware on Moto G
1. Install Motorola Device manager on your computer (for diver).
2. Install Minimal ADB and fastboot driver you have downloaded earlier on your PC (if adb not installed).
3. Extract the downloaded stock firmware and fastboot into a folder on your desktop (extract fastboot to the same folder)
4. Enable USB debugging mode on your phone from developer option. To do so, got to Settings -> About Phone and tap 7 times on the build number to get developer option.
5. Connect Moto G to your PC via original USB cable.
6. Run Minimal ADB and fastboot you downloaded earlier and type the below code:
adb reboot-bootloader
This will reboot your device into bootloader mode
7. Open the folder (where you extracted the firmware and fastboot file) and open a command prompt there. To do so, hold down shift key, then right click using mouse and select “Open command window here“.
8. Now, enter the following commands into the command prompt one by one:
mfastboot flash partition gpt.bin

mfastboot flash motoboot motoboot.img

mfastboot flash logo logo.bin

mfastboot flash boot boot.img

mfastboot flash recovery recovery.img

mfastboot flash system system.img_sparsechunk.0

mfastboot flash system system.img_sparsechunk.1

mfastboot flash system system.img_sparsechunk.2

mfastboot flash modem NON-HLOS.bin

mfastboot erase modemst1

mfastboot erase modemst2

mfastboot flash fsg fsg.mbn

mfastboot erase cache

mfastboot erase userdata

mfastboot reboot
Your Moto G will reboot after the process is completed. Now your device is unrooted and back to the stock firmware.


![[Update] Download Samsung Stock Firmware Directly From Samsung Servers & Install via Odin Samsung-Galaxy-S10](https://techtrickz.com/wp-content/uploads/2019/03/Samsung-Galaxy-S10-218x150.jpg)

This link does not work: Moto G stock firmware