If you are an Android fan looking for customizing your 2nd Gen Moto E 2015 with custom ROMs, Xposed Framework modules, as well as flashing system apps, the most important prerequisites are unlocked bootloader, a custom recovery and root access. Though you can do all these via command prompt, the Moto E 2015 Toolkit helps you do with a few clicks.
Moto E 2015 Toolkit is a one click unlock & relock bootloader, one click recovery installer, and a reboot into recovery/fastboot tool for 2nd Gen Moto E 2015. All you need a computer and a USB cable to establish connection between your Moto E and computer. Also, it will download the required driver for your Moto E 2015.
Using Moto E 2015 Toolkit is simple. Just download the exe file [HERE] and install it on your computer. It requires Microsoft .Net 4.0 on your PC, so download [HERE] and install it first and then run the Moto E 2015 Toolkit.
How to use Moto E 2015 Toolkit
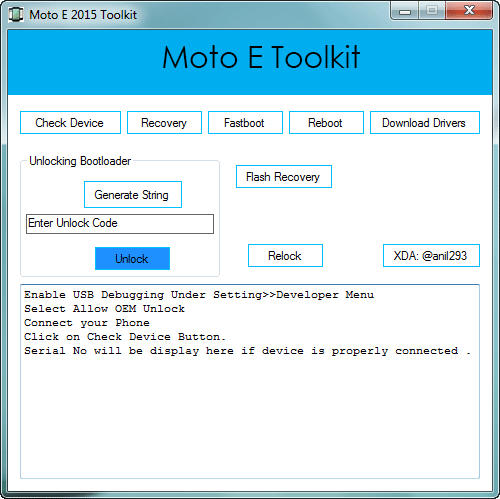
1. Turn on USB Debugging on your phone. To do so, go to Setting ->Developer options and enable USB Debugging. (If you have not enabled the Developer options, then go to About phone under Settings and tap build number 7 times).
2. Now, run Moto E Toolkit, click ‘Download Drivers’ button and then install it. Once done, click ‘Check Devices’ button to see your device is listed. If everything is OK, proceed with unlocking bootloader and installing custom recovery.
How to Unlock & Relock Bootloader with Moto E 2015 Toolkit
Warning: Unlocking Bootloader normally will carry out a factory reset for security reason, so back up your data first! Also, unlocking will void your device warranty and will not get any OTA update further.
Note: Moto E 2015 needs a specific authorization key provided by the manufacturer to unlock bootloader. So proceed as described below.
1. Click on ‘Generate String’ button. Your Moto E will reboot into Fastboot mode and Motorola website will be open. Sign in using your Google account or Motorola ID.
2. Copy the string from application, paste it into the website’s text field and click “Can my device be unlocked?”
3. If your device is unlockable, a “REQUEST UNLOCK KEY” button will appear at the bottom of this page.
3. Select ‘I Agree’ option. (You will receive an email with your Unlock Key at the email address you used to log in there)
4. Copy Unlock Key you got in your mail and paste it into app’s text field “Enter Unlock Code” and click on Unlock. That’s it.
Important Note: Though you can relock the bootloader by clicking the ‘Relock’ button, there is no guaranty that it can revert your device to factory state for warranty purpose. (Source – XDA)


