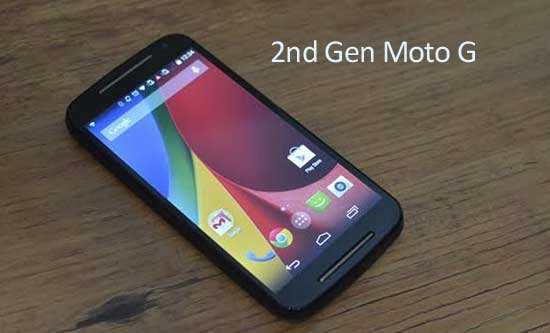
In this tutorial, we will show you how to install custom recovery and get root access on your 2nd generation Moto G 2014 edition. Custom recovery and root access on your Moto G (2014) gives vast opportunities such as backup and restore firmware, flash custom ROMs, apply various tweaks and changes that Motorola ignored to make.

For your information, following the success of last year’s best-in-class budget smartphone Moto G, Motorola has released the 2nd generation Moto G (2014 edition) with several improvements. Now it spots a larger 5-inch IPS display with 1280 x 720-pixel resolution, equipped with 8-megapixel back camera with HDR mode, powers a 1.2 GHz Qualcomm Snapdragon 400 Quad-core processor with 1GB of RAM, microSD slot for extending storage capacity, 2070 mAh battery, more slimmer and it is available almost at the same price.
Install Custom Recovery (TWRP) and Root Moto G 2014
Follow below guide and enjoy all the benefits of rooting and advantages of custom recovery on your Moto G 2014 edition.
Also Read: Unroot and reinstall stock firmware on Moto G 2014 edition
Warning: Before installing custom recovery and rooting your Moto G, please note that you need to unlock its bootloader, which means your device’s warranty will void, so proceed at your own risk.
Disclaimer: Please follow this guide at your own risk. Though we are putting our level best to provide this tutorial at its maximum perfection and accuracy, we can’t take responsibility for anything that goes wrong. This guide is intended for technically talented users only
Important: As always backup your device completely including storage, SMS, contacts, calendar etc.
Prerequisite:
1. Unlock Moto G 2014 Bootloader [Go to Motorola website to unlock bootloader]
2. Install USB drivers for Moto G [Download from here]
3. You need to setup Android SDK on your PC
4. Full battery charge on your Moto G
5. Enable USB Debugging from developer option (details here)
TWRP Custom Recovery Installation Guide
1. Download [Here] the TWRP image file for your Moto G 2014
2. Connect the Moto G to the PC using the original USB cable.
3. Go to the TWRP image file downloaded folder and open a command prompt (Press SHIFT key and Right-Click on an empty space and select ‘Open command window here’)
4. Issue the below command to reboot your device into fastboot/bootloader mode:
adb reboot bootloader
5. Once your device entered into bootloader mode, issue the following command to flash the TWRP recovery:
fastboot flash TWRP2801-titan-motog-2014.img
6. After a while, the installation will finish and you are to use TWRP Custom Recovery.
How to Root Moto G 2014
You can easily root your Moto G 2014 using Chainfire’s SuperSU.
1. Download [Here] Chainfire’s SuperSU zip file.
2. Connect your Moto G to the PC using a USB cable and transfer the downloaded SuperSU zip file to the storage.
3. Open a command window and issue the following command to reboot your device into recovery mode:
adb reboot recovery
4. From recovery, tap on Install and select the SuperSU zip file.
5. Slide the button on the bottom to start the flashing process.
6. After installation finished, tap on ‘Reboot System’ to reboot your device.
Your Moto G is now rooted. If you come across any issue, leave it in the comment section below [via – XDA]


![Fix Unable to Boot in Recovery Mode on Samsung Phone: Showing [PDP] Error Android Recovery Mode](https://techtrickz.com/wp-content/uploads/2025/03/Android-Recovery-Mode-218x150.jpg)
![[Guide] Realme 3 Pro Gets Official TWRP Recovery Support Realme-3-Pro](https://techtrickz.com/wp-content/uploads/2019/04/Realme-3-Pro-218x150.jpg)