One more device in the Nokia smartphone family has been upgraded to Android 9 Pie. The latest addition is Nokia 7.1 that was launched under the Android One program back in October 2018. If you own a Nokia 7.1, below is the guide to install the official Android 9.0 Pie update manually on it
HMD Global released Android 9 Pie stable OTA update for Nokia 7.1 with several new features and UI changes. You can enjoy new gesture navigation, adaptive battery, adaptive brightness, new camera app, Google Lens, and Google motion integration, several optimizations and general bug fixes.

The incremental OTA update will take few days or weeks to get on all devices. You can check the Pie update manually by going to your Phone Settings > About phone > System updates. If you want to install the stable Android 9 Pie update on Nokia 7.1, then follow our below guide.
Related:
- Install Android 9 Pie Stable Update on Nokia 7 Plus
- Install Android 9 Pie Update on Nokia 6.1 & Nokia 6.1 Plus
Requirements:
– ADB and Fastboot driver setup on your PC
– Android 9 Pie stable OTA update file for Nokia 7.1 [here]
– More than 70% battery charge on the phone
– Backup important data on the phone
How to Install Android 9 Pie Stable Update on Nokia phone
Disclaimer: Before start, do remember that we are not responsible for anything that goes wrong by installing Nokia 7.1 Android 9 update. Follow the guide at your own risk.
1. Download Android 9 Pie Stable OTA update file for your device (link above)
2. Save the OTA zip file inside ADB installation folder/Platform Tools folder
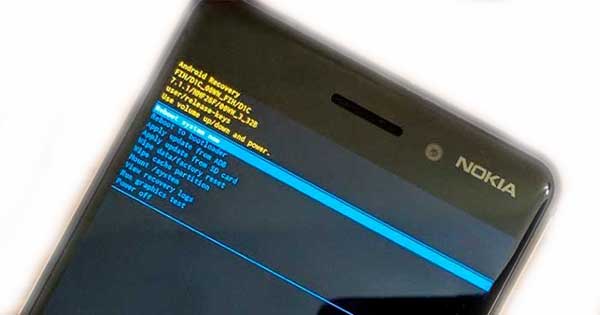
3. Boot your phone into stock Recovery
[To do so, turn off the phone completely. Now, press and hold Power + Volume Up buttons together until you see ‘No command’ appears on the screen. Hold the Power button and tap the Volume Up key once to enter into stock recovery]4. From stock Recovery, navigate to ‘Apply update from ADB’ option (use Volume keys) and select it using Power button.
5. Connect your phone to your PC via a USB cable
6. Open a command window from where the Android 9 Pie OTA zip file is saved
7. Execute the command ‘adb devices’ to ensure your connection with your PC.
8. Now, type the command ‘adb sideload ota-update.zip’ and hit Enter key
9. Once the installation process finishes, select ‘Reboot system now’ on your phone. [source – XDA]