OnePlus team has released OxygenOS 3.2.2 update for OnePlus 3 with various optimizations and latest security patches. As usual, the OTA (over-the-air) update will be rolled out in phases, so it will take some days to reach on all devices. If you prefer manual installation, then you can download and sideload OxygenOS 3.2.2 OTA or Full ROM on OnePlus 3 via ADB. Read on to know how the installation instruction.
In the below guide, we show you the manual installation procedure for OxygenOS 3.2.2 on OnePlus 3 (both OTA and Full ROM). Before get start, let us see what is new in this update. This new update include improved notification management, better noise cancellation in video recording, disables fingerprint sensor while in pocket, latest Android security patches and various optimizations.
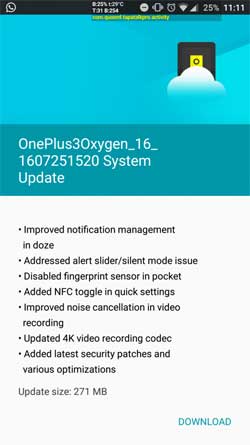
Below are the main changelog and features of OxygenOS 3.2.2 for OnePlus 3
– Improved notification management in doze
– Addressed alert slider/silent mode issue
– Disabled fingerprint sensor while in pocket
– Added NFC toggle in quick settings
– Improved noise cancellation in video recording
– Updated 4K video recording codec
– Added latest security patches and various optimizations
How to install OxygenOS 3.2.2 Update on OnePlus 3 Manually
Disclaimer: Follow the instruction at your own risk. We will not be liable if any damage occurs to your device and/or its components.
Note: The below method requires ADB and fastboot drivers installed on your PC. Read this guide for details.
Note: If you have already updated to OxygenOS 3.2.1, just download the OTA file (271MB) and update via ADB.
Oxygen OS 3.2.1 OTA (271MB) Installation Instruction
1. Download the Oxygen OS 3.2.1 OTA zip file (271MB) [HERE] on your computer. Rename it to ‘oxygenos.zip’ and save it in the ADB installation folder.
2. On your OnePlus 3, enable USB Debugging in Developer Options (Go to Settings > About Phone and tap on Build Number 7 times to enable the Developer Options).
3. Now, boot your phone into Recover mode. To do so, go to Settings > Developer Options > enable Advanced Reboot. Then long press on the Power button > Reboot > Recovery. Choose Install from ADB Sideload, and then connect your OnePlus 3 to your PC via a USB cable.
4. Now, on your PC, go to ADB installation folder, open a command window there and issue the below command:
adb sideload oxygenos.zip
Once the installation process finished, reboot your phone. Note that the first boot will take 5-10 minutes.
OxygenOS 3.2.2 full ROM (1.2GB) Installation Guide
Note: If you have not installed the 3.2.1 update, then download the full ROM [HERE] (1.2GB) and sideload it via ADB.
1. Enable ‘USB debugging’
2. Download the OxygenOS 3.2.2 for OnePlus 3 (link above) and save it inside the folder where ADB installed.
3. Turn Off your phone and boot into recovery mode. In recovery, select Install from ADB Sideload
4. Now, connect your phone to your PC, go to ADB installation folder (where you saved OxygenOS 3.2.2) and open a command window from there.
5. Type the below command to know the connection between your phone and PC. If not, install proper driver on your computer.
adb devices
6. Now, issue the below command to flash the Oxygen OS 3.2.2 on OnePlus 3:
adb sideload File Name.zip
7. Wait until the process complete and then reboot your phone.
The first boot will take 5-10 minutes. If you have any question, leave it in the comment section below. (Source – OnePlus)


