The term “Rooting” refers to unlocking access to system ?les and functions on a device that are normally blocked for the user. By rooting your Android phone, you can perform several things on your phone, though it’ll void your device’s warranty. For installing certain apps, installing custom recovery, flashing custom ROM, etc. need root access.
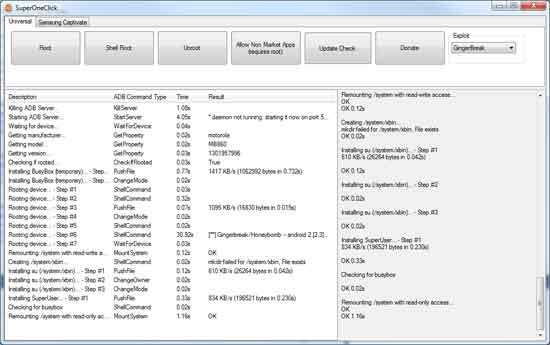
The rooting process differs from one device to the next, although there are a number of toolkits that make the job a whole lot easier. For a beginner, I would recommend to use the free tool “SuperOneClick” to root and unroot their device.
SuperOneClick is a one click rooting solution that’s ideal for newcomers. It supports a wide range of devices, especially among newer models.
Disclaimer: This guide should give you how to root your phone, but we can’t take responsibility for anything that goes wrong. As always, make sure you are fully backed up before attempting to root your device.
How to use SuperOneClick?
Download SuperOneClick from source here on your PC, extract the Zip file and run the setup file (no installation needed).
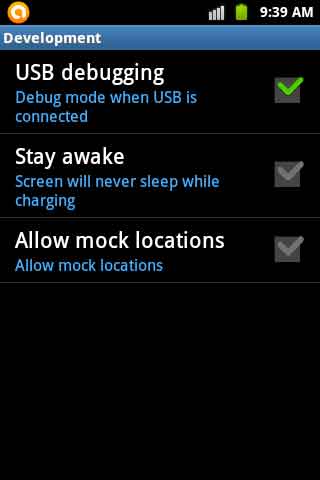
– Before connecting your device, check that its USB Debugging option is enabled in Settings > Apps > Development.
– Make sure you don’t mount your SD card by going to Settings > SD card and Phone Storage.
– Also, don’t forget to install correct drivers for your device. If you can’t find driver for your device, follow this guide to install driver.

Now, connect your device using USB, launch the SuperOneClick app on your hard drive and click “Root” to begin rooting (If SuperOneClick can’t detect your device, check you have the correct drivers installed).
After completing the process, check your device is rooted. Select “Yes” when prompted to test the root and Android will send a “su” command to your device. If root has been successful, you will see a new SuperUser icon in the app drawer.


![[U]Coolmuster Android SMS + Contacts Recovery App (Giveaway) Coolmuster Android SMS + Contacts Recovery](https://techtrickz.com/wp-content/uploads/2025/05/Coolmuster-Android-SMS-Contacts-Recovery-218x150.webp)