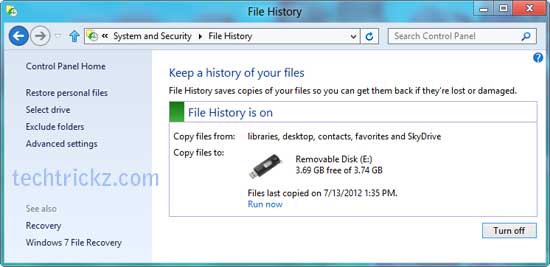
Like Mac OS X’s backup utility “Time Machine”, Windows 8 has a built-in back up tool called “File History” that scans your system for personal file changes (personal files stored in Libraries, Desktop, Favorites, and Contacts folders, etc) and back them up on an external storage device without any user intervention at scheduled intervals. As this is an important layer of data protection, this new feature will definitely give a big boost to the Windows 8 operating system.

How to enable File History in Windows 8
File History feature is disabled by default. You need to enable it to use this security feature. Before that, you’ll need to connect an external or network drive to your system.
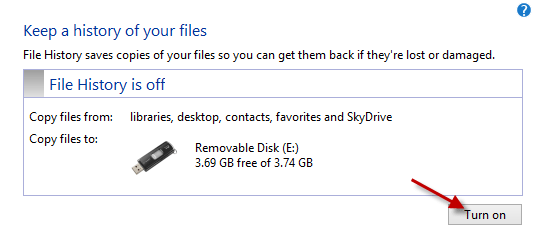
Click Win + W key to bring Settings Search box and start typing File History. Select the File History icon under the search results. File History is off by default, click “Turn On” option and it will start to backup of all of your important data right away.

How to Set Up File History in Windows 8
You can configure and setup File History tool by clicking on each option shown on the left sidebar of the window.
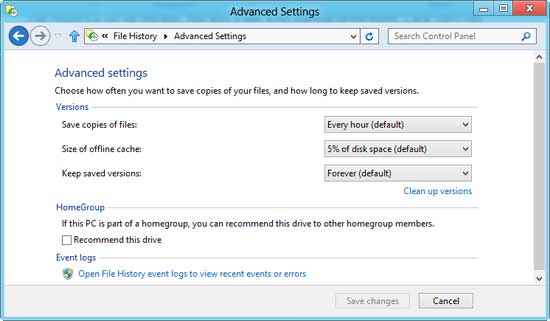
By default, it’ll scan and backup personal files every hour. You can change this by clicking “Advanced Settings”. You can select from every 10 minutes to everyday. Alternatively, you can manually backup file by clicking “Run Now” option.

You can also exclude specific folders or libraries that you don’t want to back up by clicking “Exclude folders” option. Click “Add” option and then browse the folder or library location.
To add a network drive to store your files, click “Select Drive” option. Then click “Add Network Location” and browse to the directory that you want to back up to.
To restore your personal files, click “Restore personal files” option and then follow the on screen instruction.
Note: Above is a small description about the Windows 8 File History. We’ll bring more detailed story in upcoming posts.


