Creating a WiFi hotspot (access point)on an Android phone comes in handy in several situations. For example, if one of your friends has an urgent email to send from his phone, but he doesn’t have a data plan on his phone, you can help him by sharing your data plan. In other words, you can simply share your internet connection with your friends and family. All are by creating a Wi-Fi hotspot or by making an access point on your device.
Creating a Wi-Fi hotspot on an Android phone is quite simple. Just follow as given below. The tutorial is based on Android firmware 2.3, but it is more or less identical with other firmware versions.
How to create a WiFi hotspot on Android?
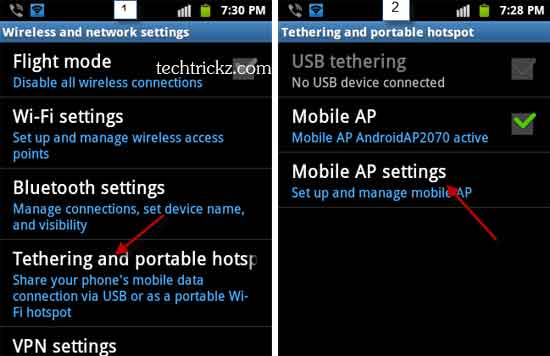
Step 1: Open the Settings menu, select “Wireless & Networks” and then select “Tethering and portable hotspot” option.

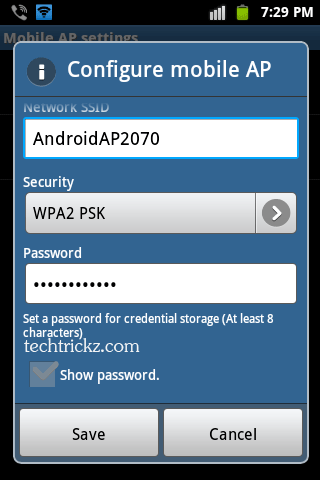
Step 2: Tap on “Mobile AP Settings” and choose “Configure Mobile AP”. Assign a name to the network (SSID) andenter a password. Then press “Save” to complete the settings. Now, your wireless hotspot is ready.

Step 3: To enable it, go back to the Tethering & portable hotspot menu and tap on it, then check the box next to “Mobile AP”to enable Wi-Fi hotspot.
Now you’ll be able to find the Wi-Fi network from any WiFi-enabled mobile device – Android, iPhone or tablet and access internet by entering the password that we have set in the above step.


Very nicely illustrated. Thanks!!
Thanks for sharing this simple tut. It is awesome!