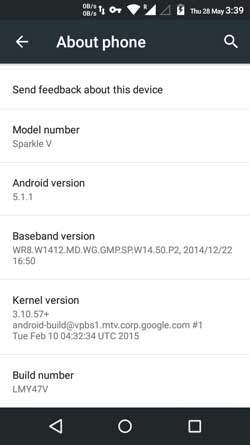
Android 5.1.1 Lollipop (build LMY47V) update for Android One devices has confirmed and users will receive the OTA update shortly on their device. If you have not received the OTA notification message on your Android One for some reason, for example due to unlocked bootloader or cannot wait for Google for the Android 5.1.1 OTA update, you can install the OTA update manually.
Today’s guide is for those who want to install official Android 5.1.1 Lollipop update manually on their Android One smartphone. This OTA update supports all Android One devices such as Micromax Cavas A1 AQ4501, Dream Uno, Karbonn Sparkle V, Symphony Roar A50 and Nexian Journey One Mi438S.

Android 5.1.1 Lollipop (build LMY47V) update for Android One devices will fix bugs found in the previous build and enhance performance. The update will fix issues like app force close, overheating, screen freezes, app crashes as well as battery drain.
Note: Please note that in this method we use lollipop system dump to restore the firmware via a simple trick. Though this is a 100% working method you should take extra care, otherwise, you will end up with a bricked phone. Your phone should be on Android 5.1 and do not delete any system app. All credit goes to the XDA developers’ forum.
Warning: Do NOT forget to back up your phone data. Also, follow the instruction at your own risk. We will not be liable if any damage occurs to your device and/or its components. This is recommended for technically talented users only.
Manually Install Official Android 5.1.1 Update on Android One
1. Download Philz Touch recovery [HERE] and install it
2. Download Android 5.1.1 OTA update zip [HERE] file and unzip the content
3. On your phone, create a folder inside the external SD card and rename it as ‘clockworkmod/backup’.
4. Connect your phone to your PC and move the unzipped firmware folder (2010-01-01.00.02.00_LMY47V) inside the clockworkmod/backup folder.
5. Now, boot your phone into Philz recovery.
6. From recovery, choose Wipe and Format option and then perform Wipe Cache Partition, and from advanced option Wipe Dalvik Cache.
7. Now, go to Backup and Restore option, select Custom restore from external SD card, and select restore only /system and /boot.
8. Choose 2010-01-01.00.02.00_LMY47V and tap on boot.img
9. Once done, reboot your phone from recovery main menu. (First boot may take some time)

Your Android One device will boot into the latest Android 5.1.1 Lollipop (source – Abhijitkadam03)


my phone build number: MRA58N