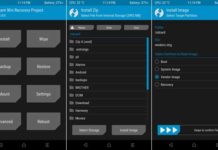
The TWRP (Team Win Recovery Project), the most popular and loved custom recovery is now officially available for the brand new Google Pixel 3 and Pixel 3 XL. Official TWRP support is always been a very important thing for tech-savvy users, as it helps to flash custom ROMs, backup and restore system partitions, flash different Mods, get root, sideload OTA update and more.
Google launched Pixel 3 and Pixel 3 XL with top most features, but some users might want even more features on their device. TWRP recovery is the starting point of making changes that are more interesting on their smartphone. TWRP recovery offers additional features over stock recovery.
![]()
Before installing TWRP on your brand new Pixel phone, note that a couple of things not working with current version of TWRP. For Pixel 3, MTP does not work at this time, but you can use adb to transfer files. For Pixel 3 XL, both MTP and adb do not work. You may need to use a USB-OTG cable to transfer files
How to Install TWRP on Google Pixel 3/3XL
Installing TWRP on Google Pixel 3/3 XL is not a complicated process, but since the device uses the latest AB partitioning system there is slight changes in the installation process.
As you may know, unlocked bootloader is a mandatory for installing TWRP on the device. So, first unlock booloader of Google Pixel 3/3XL [guide] and proceed with below steps.
Disclaimer: Before start, do remember that we are not responsible for anything that goes wrong by following the guide. It’ll void your device’s warrantee. Follow the guide at your own risk.
Requirements:
–Google Pixel 3/3XL with unlocked bootloader
– ADB and Fastboot driver on PC
– Download TWRP installer for Pixel 3 (twrp-pixel3-installer-blueline-3.2.3-0.zip) and TWRP for Pixel 3 (twrp-3.2.3-0-blueline.img) from here.
– Download TWRP installer for Pixel 3 XL (twrp-pixel3-installer-crosshatch-3.2.3-0.zip) and
TWRP for Pixel 3 XL (twrp-3.2.3-0-crosshatch.img) from here.
Installation Instruction
1. Save the downloaded TWRP img file inside the ADB folder.
2. Transfer the twrp-installer zip to your phone’s storage.
3. Switch off the phone, hold Volume Down button and press Power button. Your device should now be in the bootloader.
4. Connect the device to your PC. Open a command prompt from ADB directory and run the following command:
fastboot boot twrp-3.2.3-0-blueline.img
or
fastboot boot twrp-3.2.3-0-crosshatch.img
5. The above command will boot your device into TWRP temporarily.
6. In TWRP, go to install and browse to the twrp-installer zip file saved on your phone and install the zip. The zip will install TWRP to both boot slots.
7. Once done, reboot your phone.
After installing TWRP, you can use Magisk to root your Google Pixel 3 or Pixel 3XL.

![[Guide] Realme 3 Pro Gets Official TWRP Recovery Support Realme-3-Pro](https://techtrickz.com/wp-content/uploads/2019/04/Realme-3-Pro-218x150.jpg)

![Pocophone F1 (beryllium) Receives Official TWRP [How to Install TWRP Without Error] xiaomi-pocophone-f1](https://techtrickz.com/wp-content/uploads/2018/08/xiaomi-pocophone-f1-218x150.jpg)
![OnePlus 6T (fajita) Received Official TWRP Support [Installation Guide] OnePlus-6T](https://techtrickz.com/wp-content/uploads/2018/11/OnePlus-6T-218x150.jpg)