Verified Calls is a new Caller ID feature in the Google Phone app. Dedicated for business calls, it is part of Caller ID and spam protection of the app and helps you verify legitimate business calls. Verified Calls is now available to all android users, but disabled by default. So here’s how to enable it on your Android phone.
If you turn on the Verified Calls feature on your Android phone, it will display the caller’s name, company logo, the reason for calling, and a verification symbol on the calling screen when you receive a call from a business. To receive this extra information on your Android phone, follow the below steps.
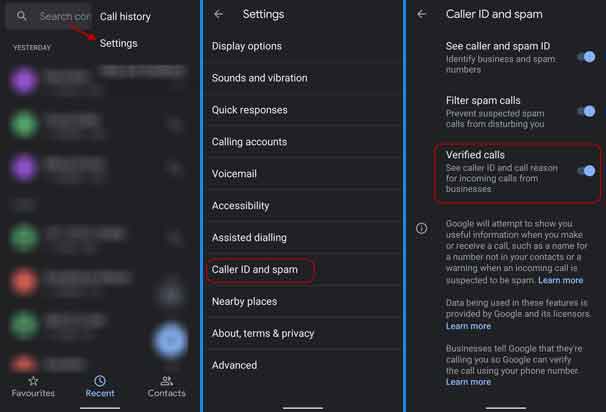
Steps to Enable Verified Calls on Android Phone
- Update Google Phone app to latest version. If you don’t have it on your phone, install it from Play Store and make it the default calling app.
- Open Phone app and tap on three vertical icon at the top right corner.
- Tap on Settings, and then tap on Caller ID & spam.
- Enable Verified Calls, and other two options – See caller and spam ID and Filter spam calls.
So, this is how to enable Verified Calls on Android phones. Now, you should see verified pop up when you receive calls from a business if it is verified by Google. However, keep in mind that it won’t stop annoying robocalls and spam as this feature won’t stop unverified business calls.


