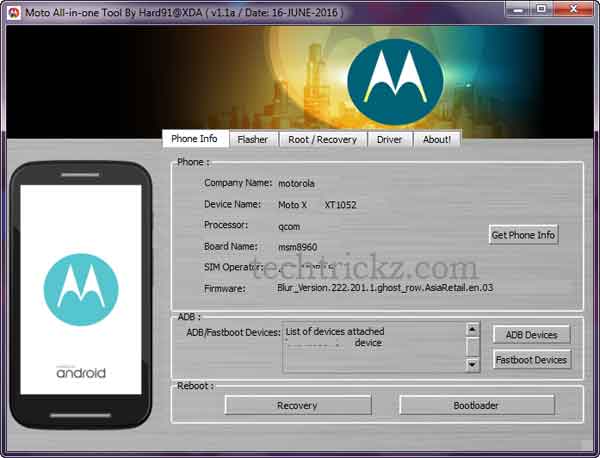
If you are looking for a simple solution to restore stock firmware on any of your Moto phone, then the Moto All-In-One Tool is for you. This Windows application not only helps you restore stock firmware, but it will also let you unlock and relock the bootloader, install custom recovery like TWRP, restore stock recovery, root your Motorola phones and remove bootloader warning message by flashing logo.bin. In addition, this tool installs ADB & Fastboot driver on your PC.
In this guide, we show you how to install Moto All-In-One Tool on your computer and how to use it to restore stock firmware, install TWRP recovery and root your Moto device. Developed by the XDA contributor hard91, the Moto All-In-One Tool is easy to use, because you do not need to issue any commands. You can do all the mentioned things via its GUI.
Before get start, please note that, the Moto All-In-One Tool does not download stock firmware, recovery, custom ROM, etc. for you. You have to download required files from sources.

Table of Contents
How to use Moto All-In-One Tool
1. Download Moto All-In-One Tool [Development Page] and unzip the content.
2. Run the Moto All-In-One Tool exe file to install it on your computer.
3. To use this tool with your phone, you need to install driver for your phone. To do it, open Moto AIO tool, then click the ‘Driver’ tab.
4. Click on ADB & mFastboot Drivers and proceed with the installation. Do not change the installation directory.
Now you can use this tool to install stock firmware, custom ROM like CyanogenMod, unlock bootloader, install TWRP recovery, get root access, etc.
How to Restore stock firmware using Moto AIO tool
1. First, you need to download stock firmware for your phone
2. Open Moto AIO tool, connect your phone to your PC, click ‘Auto’ button to boot your phone into fastboot mode. If it fails, manually boot into bootloader.
3. Now, click ‘Browse’, and then navigate to the stock firmware (fstboot flashbale) you have saved on your computer.
4. Select lock bootloader or Un-lock bootloader (if bootloader is previously unlocked it will not lock it).
5. Click ‘Flash’ button. Wait until the process finishes and reboot your phone.
That’s it. The first reboot will take 5 to 10 minutes.
How to install Custom ROM, TWRP recovery and Root Moto phones
1. To install TWRP recovery, click Root/ Recovery tab on Moto AIO tool.
2. In ‘Flash recovery’ box, click browse, navigate to TWRP recovery image and then click ‘Flash’ button.
3. To root your phone, in ‘Root’ box, click browse, select the SuperSU zip file you have saved on your PC and then click ‘Flash’ button.
4. To install custom ROM, in ‘Side Load’ box, click browse, select the ROM zip file and then click ‘Side Load’ button.
Note that to install custom ROM, your device should be unlocked and have root access. To unlock the bootloader, use the ‘Lock/Unlock Bootloader’ box. You should have bootloader unlock key. (Source – XDA)


