Old, corrupt, or incompatible driver files on a Windows 11 system can lead to system performance issues, device malfunctions, and even system crashes. The only effective solution is to completely uninstall these problematic driver files from your computer. Here’s a step-by-step guide on how to remove driver files completely from your Windows 11 system.
Uninstalling driver files using the Windows Device Manager may not always completely resolve driver-related issues. This is because the removal process may not completely eliminate driver files from your computer. Leftover residues in the Windows Registry and other areas of the system can still cause problems.
To uninstall problematic device driver files completely from Windows 11, first you need to uninstall it in Device Manager, then delete its base files from System 32 folder, and finally remove its entry from Windows Registry.
Warning: The following steps require you to remove files from sensitive areas of the Windows 11 system. It is strongly advised that you create a System Restore point before attempting these steps to ensure that you can revert your system to its previous state if necessary.
Step-by-Step Guide to Completely Uninstall Device Driver From Windows 11
1. First, open the Windows Device Manger. To do so, right click the Start button and select Device Manager.
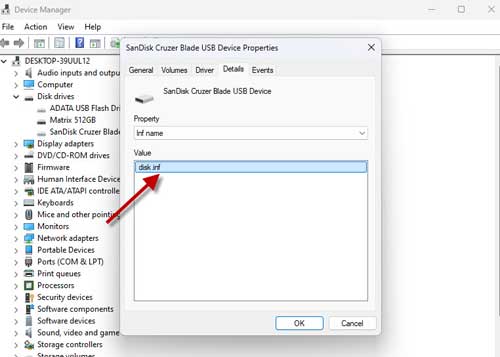
2. In the Device Manager window, double click on the driver you want to uninstall.
3. Select the Details tab, then click the Property drop down menu and select Inf name. Note down the name.
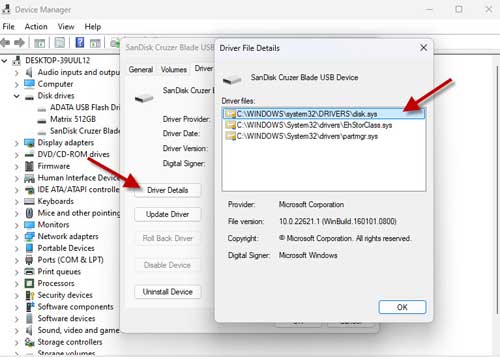
4. Next, select the Driver tab, then click Driver Details. Note down the driver name (with .sys extension) and file location.
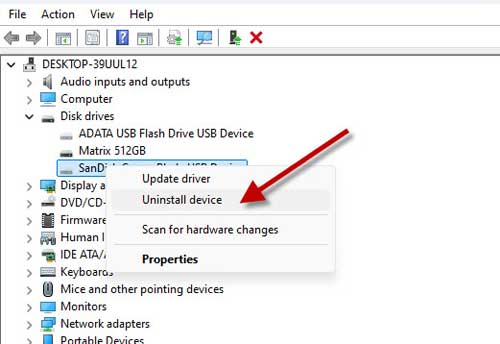
5. Now, go to Device Manger, right-click the driver file you want to remove and select Uninstall device option.
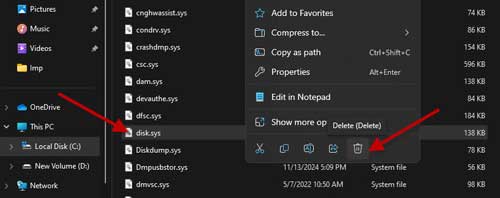
6. Next, navigate to C:\Windows\System32\drivers folder and find driver name mentioned in step 4 (.sys file). If the file present, right-click and delete it.
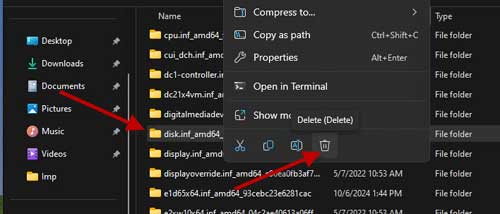
7. Next, navigate to C:\Windows\System32\DriverStore\FileRepository and locate the driver name mentioned in step 3 (.inf file). Right click on the folder to delete it.
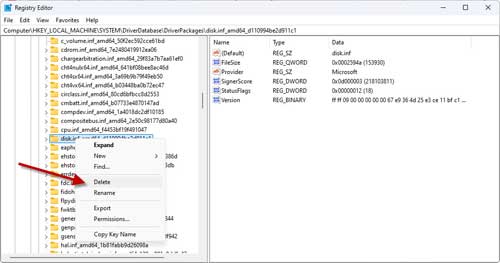
8. Finally, you need to delete the driver registry entry. Open Registry editor, navigate to HKEY_LOCAL_MACHINE\SYSTEM\DriverDatabase\DriverPackages. Click the sub-key and confirm the driver file name mentioned in step 3 (Inf file). Now, right-click folder and delete it.
By this way you can identify and remove outdated or incompatible driver files from your Windows 11 (and Windows 10 too) PC to improve the performance of your system.

