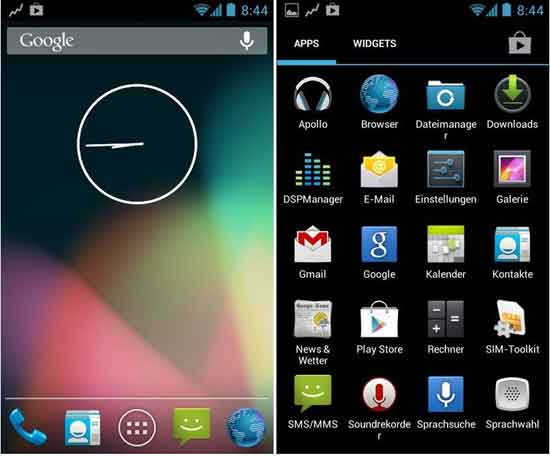
It is unclear whether Samsung will push the Android 4.2.2 Jelly Bean update to Galaxy S i9000, but the easiest way of keeping your Galaxy S fully up-to-date is through CyanogenMod custom ROM. The latest version of CyanogenMod 10.1 RC2 (pre-final release of the CM10.1 firmware) brings all the new features of Android 4.2.2, plus CyanogenMod’s own features to your Galaxy S i9000.
Learn how to upgrade Samsung Galaxy S i9000 to Android 4.2.2 Jelly Bean with CyanogenMod ROM and enjoy all the goodies – new keyboard, lockscreen widgets, improved notifications and all improvements – of most recent OS Android 4.2.2 Jelly Bean.

Prerequisites:
– CyanogenMod 10.1 ROM (currently it’s RC2, download (156Mb) it here, mirror)
– Gapps (Google apps) for CyanogenMod 10.1 (download it here, mirror)
– Rooted with ClockworkMod (CWM) recovery installed
– USB drivers are installed on your PC (If Samsung Keis installed, no USB driver needed)
– Full Battery Charge.
Important: Backup your data: First make a Nandroid backup from custom recovery (choose Backup and Restore option from custom recovery). Also backup your phone contents (contacts, SMS and other data) using any backup tool or Samsung Kies.
Note: As always, do below guide at your own risk. We will not take any responsibility for any damage to your device caused by it.
Procedure:
Step 1: Connect your phone to computer via USB cable and copy the downloaded zip files (CyanogenMod 10.1 ROM and Gapps file) to the root folder on the phone’s SD card.
Step 2: Disconnect the phone from computer, then Power off the phone and then boot it into recovery mode by pressing and holding down Volume Up, Home and Power button.
Step 3: From custom recovery, tap “wipe data/factory reset” and choose ‘Yes’ to confirm. Return to CWM recovery menu and perform Wipe Cache Partition. Finally, perform Wipe Dalvik Cache.
Step 4: Choose “Install Zip from SD card” and locate the cm-10.1.0-RC2-galaxysmtd.zip file that you copied earlier in Step 1 and select it by tapping Power button. Confirm ROM installation by choosing Yes on next screen and the installation will begin.
Step 5: Once the ROM installation is complete, once again choose “Install Zip” from SD card, locate gapps-jb-20130301-signed.zip file (Google Apps), and install it.
Step 6: Now, return to recovery main menu and tap Reboot System Now to reboot the phone into the newly installed CM 10.1 RC2 ROM.
Note: The first time it will take more time (up to 5 minutes) to boot so, be patient.
Also, if you encounter any issues with the firmware such as bootloop, once again go into recovery mode by pressing and holding down Volume Up, Home and Power button, and wipe cache partition, dalvic cache and wipe data/factory reset. Finally reboot your Galaxy S and enjoy Android 4.2.2.


![[Update] Download Samsung Stock Firmware Directly From Samsung Servers & Install via Odin Samsung-Galaxy-S10](https://techtrickz.com/wp-content/uploads/2019/03/Samsung-Galaxy-S10-218x150.jpg)

hello i upgraded to android 4.2.2 from your and it is everything ok but my sim card doesn’t work it say SIM network unlock PIN i can dismiss this but it doesn’t accept sim card what to do it isn’t a sim pin but some thing other what to do pls help
Everything is very open with a very clear description of the
challenges. It was definitely informative. Your site is very helpful.
Thanks for sharing!
In fact when someone doesn’t understand then its up to other visitors that they will assist, so here it occurs.
Hello, I enjoy reading all of your article. I like to write a little comment to support you.
Having read this I thought it was rather enlightening.
I appreciate you taking the time and energy to put this short article together.
I once again find myself personally spending a lot of time both reading and leaving comments.
But so what, it was still worthwhile!
Fantastic post but I was wondering if you could write a litte more on this
topic? I’d be very thankful if you could elaborate a little bit further. Bless you!