Android One devices have received the first official CyanogenMod 12.1 custom ROM in the form of nightly. The ROM (sprout4 & sprout8) works on all 10 Android One phones (both 4GB and 8GB variants) and offers many features, which are currently not available in the stock Android operating system, like the theme engine to personalize your phone and more.
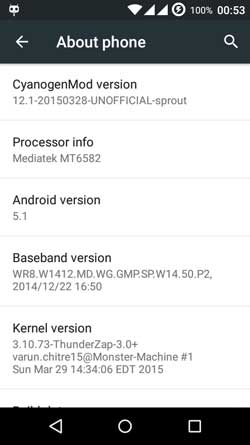
Based on the Android 5.1.1 Lollipop, the CyanogenMod 12.1 ROM (Nightly) for Android One can be installed via custom recovery. The AOSP (Android Open Source Project) based CyanogenMod custom ROM is super slick and fast. The latest build CM12.1 is built on the Android 5.1.1 Lollipop, and it is open to customization.

Of course, Android One runs the latest version of OS and gets the new version soon after it is released. However, custom ROM lovers may follow the below installation guide to update their Android One smartphone to CM 12.1 custom ROM. Before you get start, please note that this is a nightly build ROM, which means it is unstable, though most things works well.
The CyanogenMod 12.1 ROM requires clean installations, which means you, need to wipe your system before flashing the ROM. It also means you will void your device warranty.
Installation Instruction
Note: For installing this ROM requires root access and custom recovery installed on your phone.
WARNING: This procedure will void your device’s warranty. Follow the instruction at your own risk. We will not be liable if any damage occurs to your device and/or its components.
Important Note: As always, backup any important file stored on your device before flashing the ROM.
1. Download the CM12.1 for Android One 4GB variant (sprout4) [HERE] and 8GB variant (sprout8) [HERE]. Copy the zip file to your device’s internal storage. Also download Gapps [HERE] and move it to your device’s internal storage.
2. Boot your device into Recovery mode. To do so, turn off your phone, press and hold the Volume (+) and the Power button together until the device turns on. Then press the Volume (-) to select “Recovery mode.
3. From recovery mode, take a backup of your current ROM (Nandroid backup). Then does a complete wipe (cache partition, wipe system, data/factory reset, davik cache)
4. Go back to the main recovery menu and select install zip.
5. Navigate to the CM12.1 ROM’s zip file, and flash it. Wait until the flashing process finishes.
6. Once the ROM is flashed, flash the Gapps package in a similar way like you flashed the ROM file.
7. After flashing both the files, go to back to the main menu, select Reboot to reboot your phone.
Your device will now reboot with CM12.1. Leave your views in the comment section below (source –XDA).


Comments (2)
It is official. Check the link for download. Also check CyanogenMod official download section.
Hey! That a unofficial CyanogenMod release. You can see that in the screen shot also. And you have written that it official in topic heading
Comments are closed.