Wireless Android Auto adapters, such as the Motorola MA1 and AAWireless, allow you to convert your wired Android Auto head unit to wireless. You do not need to connect your phone to your car via a USB cable. However, they are quite expensive (around INR 10,000 in India) and are not officially available in many regions. So, here is how to make a cheaper Wireless AA adapter for your car.
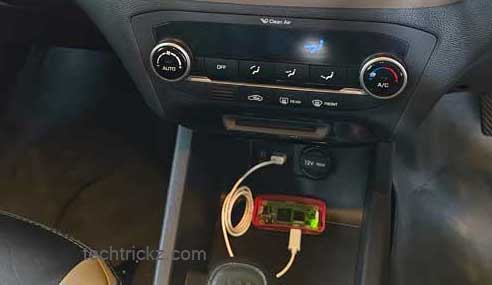
Let us learn how to make your own low-cost Wireless Android Auto adapter for your car using a Raspberry Pi. Making a Wireless Android Auto adapter is very simple with a Raspberry Pi, and it will cost you less than INR 2,000 in India. I have used the Raspberry Pi Zero 2 W board (INR 1,350 in India) and a 32GB microSD card (INR 350) to make a Wireless Android Auto dongle for my car.
With the help of the WirelessAndroidAutoDongle project (available on GitHub) and a Raspberry Pi board, you can convert your wired Android Auto to wireless. There’s no need to connect your Android phone directly to your car’s head unit. What is more, you don’t need to be a tech-savvy person to make it. Also, it just requires around 30 seconds to boot and supports all Android Auto features, including call routing, Google Maps, music control, and more.
Advantages of Raspberry Pi Based Android Auto Wireless Dongle
- Low cost – It requires less than INR 2000 (around $20) in India.
- No third-party app is needed to be installed on your phone. Just turn on the Bluetooth and Wi-Fi.
- It just require around 30 seconds to auto connect to the car and supports all Android Auto features.
How to Make Your Own Wireless Android Auto Adapter Using Raspberry Pi?
Requirements:
1. A Raspberry Pi board that comes with Wi-Fi and Bluetooth support, such as:
- Raspberry Pi Zero W
- Raspberry Pi Zero 2 W
- Raspberry Pi 3A+
- Raspberry Pi 4
2. A Micro SD card: 4GB or more is preferable.
3. WirelessAndroidAutoDongle image file (32MB) (download link) that matches your Raspberry Pi board such as:
- raspberrypi0w for Raspberry Pi Zero W board
- raspberrypizero2w for Raspberry Pi Zero 2 W board
- raspberrypi3a for Raspberry Pi 3A+ board
- raspberrypi4 for Raspberry Pi 4 board

4. BalenaEtcher (download link) or Rufus (download link) app for flashing the AA wireless dongle image file.
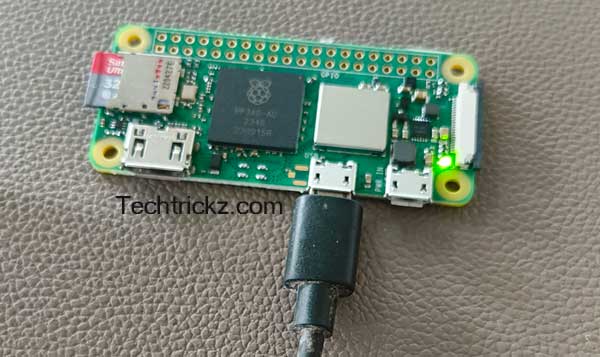
Note: In this Wireless Android Auto project, I have used Raspberry Pi Zero 2 W board (1350 INR in India), and 32GB micro-SD card (INR 350 in India). It is working perfectly well.
How to Make Wireless Android Auto Adapter?
1. First, download the Wireless AA Dongle image file for your Raspberry Pi board from the link above and save it on your PC.
2. Now, connect the microSD card to your Laptop or PC (use a card reader or USB adapter to connect it).
3. Next, double click the BalenaEtcher or Rufus exe file to open it.
4. Next, select the downloaded AA wireless dongle image file.
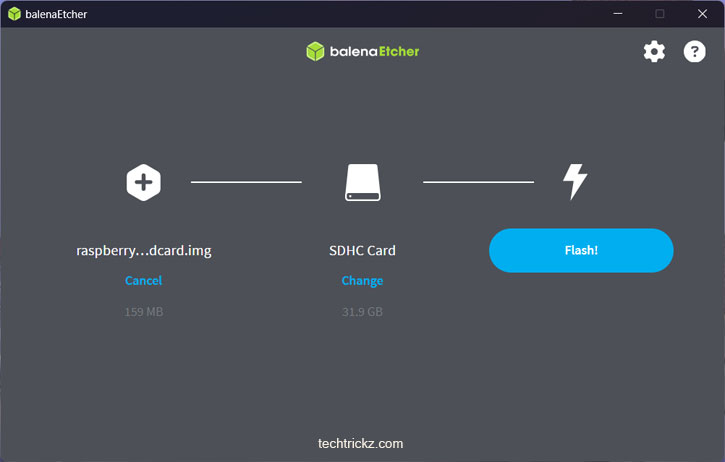
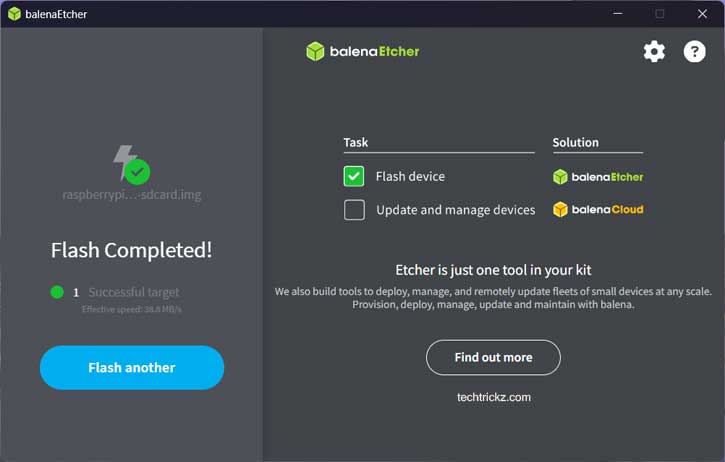
5. Select your SD card and click Flash to install the image on to the SD card.
6. Once the process completes, remove the SD card from your PC.
You have created the Android Auto wireless dongle bootable SD card for the Raspberry Pi. Follow the instruction below to connect it to your car.
How to Connect Your Raspberry Pi Based Wireless Android Auto Adapter to Your Car?
1. First, insert flashed microSD card into the Raspberry Pi board’s SD card slot.
2. Now, start your car and connect your Android phone to the car’s head unit using a USB cable.
3. Once Android Auto loads on the head unit, remove the phone from the car.
4. Now, connect your Raspberry Pi-based Android Auto Dongle to your car using a micro-USB cable.
5. Wait a few seconds until the green LED light on the Raspberry Pi board became stable.
6. Next, on your phone, open the Bluetooth settings and look for AndroidAuto-Dongle or AA Wireless Dongle.
7. Tap on it and pair it with your phone. Grant the necessary permissions.
8. Now, open the Wi-Fi settings on your phone and look for AAWirelessDongle.
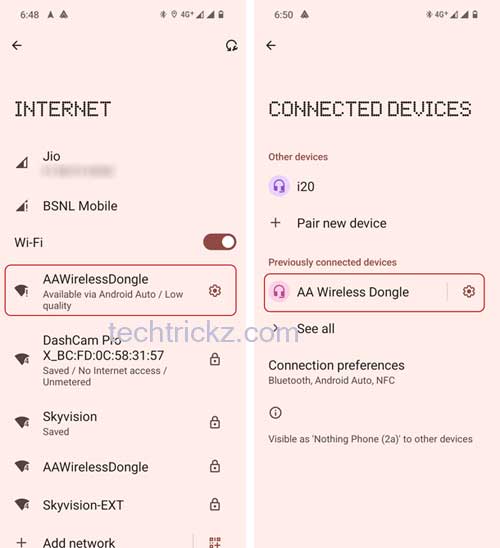
9. Tap on it to connect. If need, enter the password ConnectAAWirelessDongle to connect.
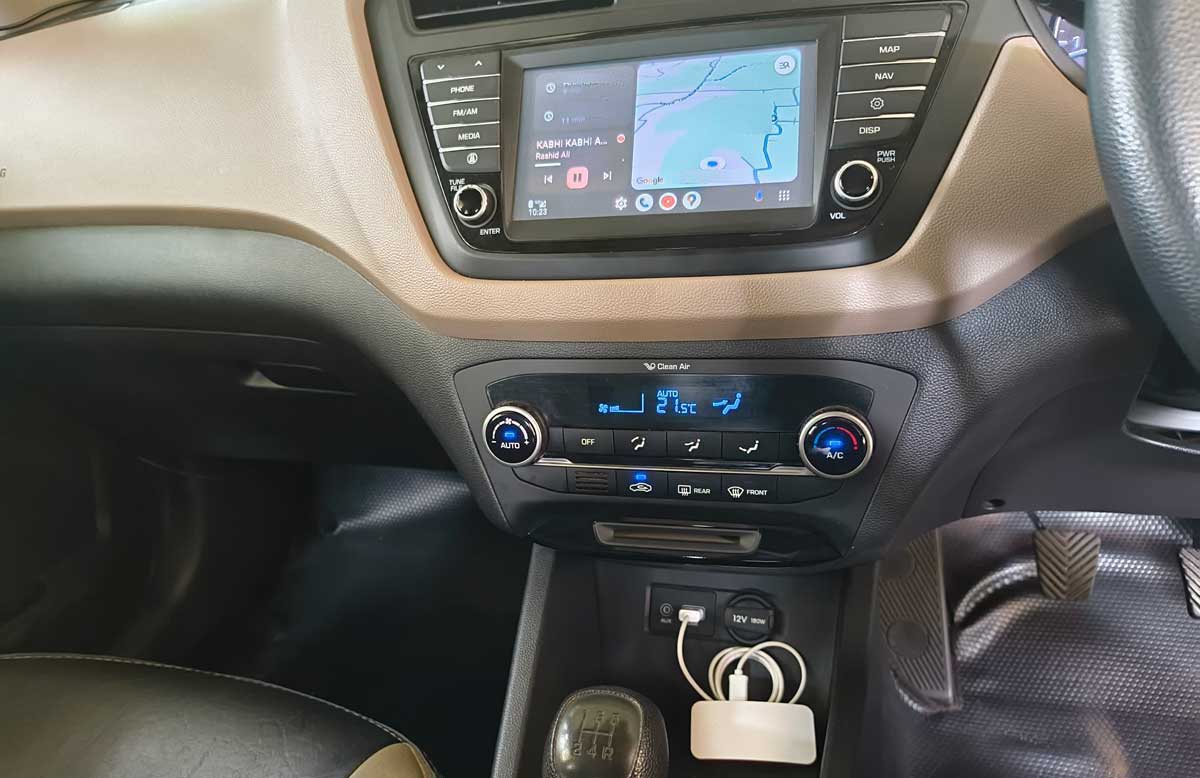
10. Now, Android Auto should appear on your car screen. You can now use Android Auto wirelessly with all the features.
The next time, your AA Wireless adapter should connect to your car automatically, if Bluetooth and Wi-Fi is turned on.
Troubleshooting:
Your Wireless Android Auto project using Raspberry Pi should work in the first instance. However, it may not work on some head units.
If your AA Wireless dongle doesn’t work the first time, turn off the car and power it on. Now, connect to the AAWirelessDongle Wi-Fi and Bluetooth from your phone, and Android Auto should work wirelessly.
That is all how you can make your own a wireless Android Auto adapter using Raspberry Pi. In my experience, it is working perfectly and connect to my car automatically within a few seconds.


Comments (2)
The wireless Android Auto feature is enabled by default on the app. So you don’t need to do anything on the Android Auto app.
Does we need to enable Wireless Android Auto on the app to work?
Comments are closed.